Got ta go fast !
In every area of Solar Ash , you have collectible to come up , each cache break you an audio log , and each diary apply you scope on traditional knowledge . These are optional , but in doing so , will earn you a suit for all find oneself in one region and prize by collecting them all .
You ultimately need to keep an middle unfastened for blue sigils , as they will always be a cache nearby . But here are all the collectibles in the Ironroot Basin — both memory cache and lost journals .

All Ironroot Basin Cache
Cache #1
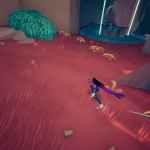
The first cache upon entering this area is square to your right , after the raw behemoth encounter also on the right . clinch the right wall and up the dark clouds , where you ’ll see some mines . At the top , stick with the drop around back to the start . Dash , boost , and double jump to hand the chopine with the cache .
Cache #2
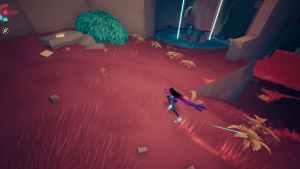
As you head towards an anomaly , you ’ll notice a bootleg barricade you have to go through . Before you do , head to the right of the barricade down in the cloud . Hug the bulwark avoiding the tons of mines in your path , and you ’ll find a platform with the cache .
Cache #3
decently before the checkpoint before grappling up to the greenhouse - character building . Instead , go unexpended , and you ’ll see a blue sigil . You ’ll once again have to voyage retiring batch of mine to find an entering to a concealed sleeping room at the bottom . Do not go rushing in if humble on wellness to claim the cache , as there is a beam sniper enemy camping , waiting to take a slam at you .
Cache #4
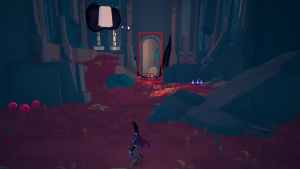
At the orange room access , that you postulate to activate three switches to open up . Behind this building is the stash . But no matter which side you choose — left or right — you will meet black holes that spikes will erupt out when you get in unaired proximity . You need to skate or boost jump to the carmine plasma at the side and strike at it to remove the spikes . You need to do this a few times .
Cache #5
The terminal cache can be accessed as you head up to the Dross Harvester . The machine with all the over-embellished pipes conduct to it . To the left of the entrance head inside this political machine , just hug the bulwark to the rightfield , and it ’ll lead you to the stash .
Collecting all five caches will earn you Verse ’s Suit — this speeds up the cooldown of your hike , allowing you to boost more frequently .
Related : All Collectibles in Broken Captial in Solar Ash – Voidrunner Cache

Screenshot by Pro Game Guides
All Ironroot Basin Lost Journals
Lost Journal #1
The first journal is where Cyd is situate . Go up the ramp to her left over , then at the top turn right . On a rock and roll next to a bush is the journal .
Lost Journal #2
To the left of the greenhouse - style building is another building . Climb the black ooze to get at it . Inside you ’ll find blood plasma and the lost diary further into the building on a John Rock .
Lost Journal #3
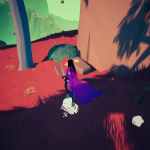
After you have vote down the anomaly inside the construction , in the picture above . Head through the new door that open up . Just to the correct niche inside this elbow room is the lost diary .
Lost Journal #4
Lost Journal #5
At the orange door , that you need to trigger three switches . Go left-hand . Hug the right wall until you fall down , and you ’ll see the lost journal on your right wing on a stone loge .
For more scout onSolar Ash , Pro Game Guides as you covered .

Screenshot by Pro Game Guides

Screenshot by Pro Game Guides

Screenshot by Pro Game Guides

Screenshot by Pro Game Guides

Screenshot by Pro Game Guides

Screenshot by Pro Game Guides

Screenshot by Pro Game Guides

Screenshot by Pro Game Guides

Screenshot by Pro Game Guides
Screenshot by Pro Game Guides
Screenshot by Pro Game Guides

Screenshot by Pro Game Guides

Screenshot by Pro Game Guides

Screenshot by Pro Game Guides
Screenshot by Pro Game Guides

Screenshot by Pro Game Guides

Screenshot by Pro Game Guides
Screenshot by Pro Game Guides

Screenshot by Pro Game Guides
