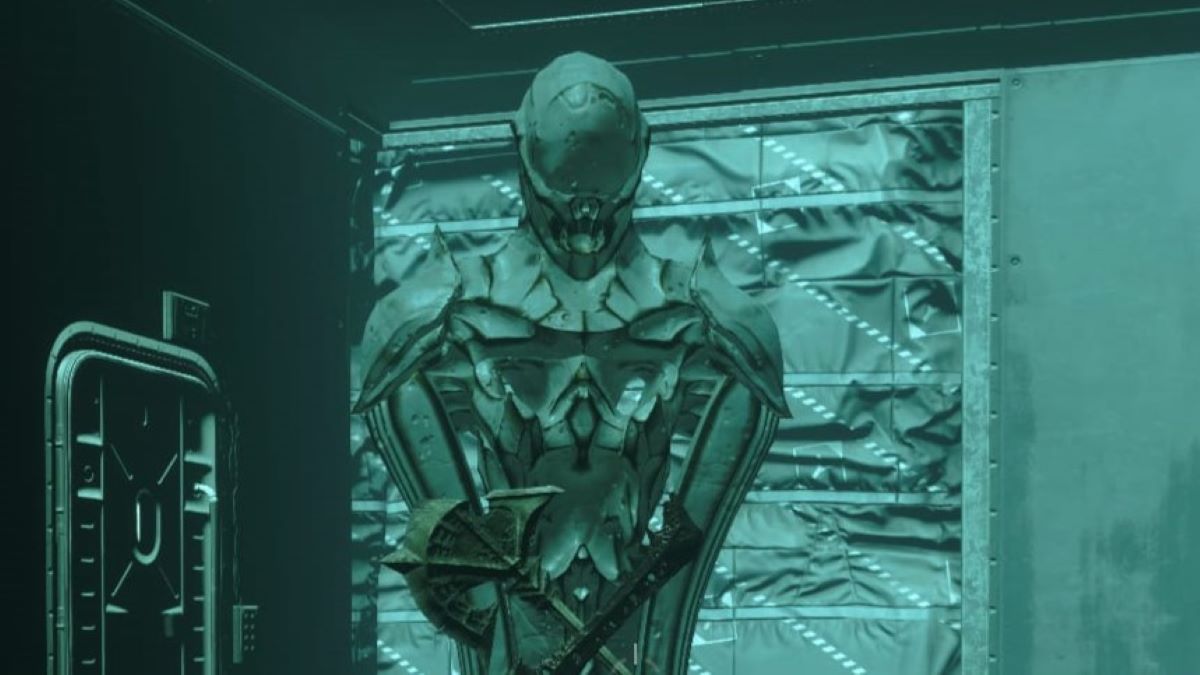
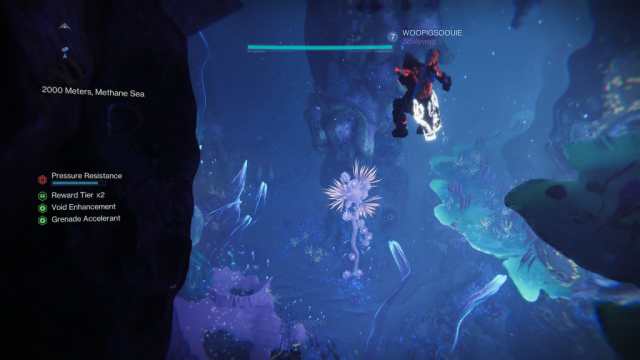
These Hive Statues are n’t ominous at all …
A new season in Destiny means plentifulness of new enigma to uncover . And for Season of the Deep , those secrets are baked into all those soggy corner of the Deep Dives . Here are all the Deep Dive secrets in Destiny 2 discovered so far .
Related : Best Destiny 2 Strand Hunter construct : PvP and PvE by PCInvasion
All Deep Dive Secrets in Destiny 2
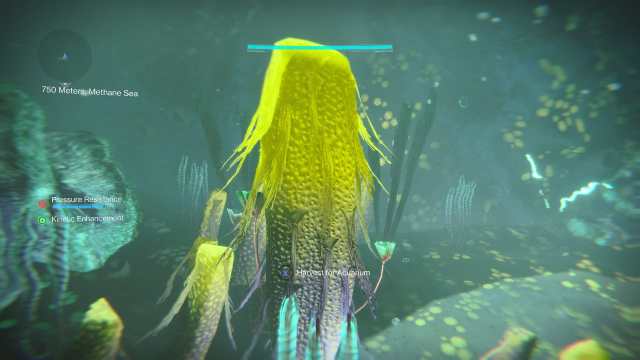
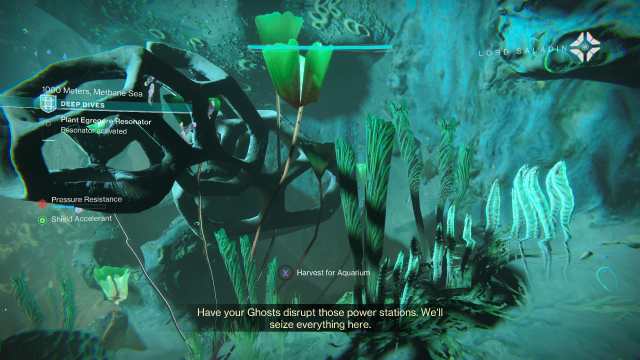
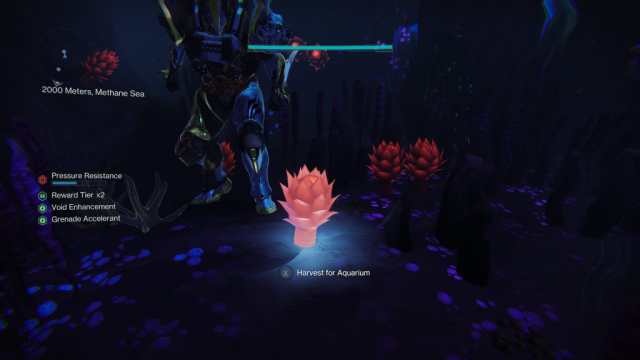
Our first set of secrets involves the aquatic flora you’re able to get hold in Deep Dives . And , fun fact , collecting these plants will add them to your marine museum ! There are six sum , but as of week one , they ’re not all accessible .
As of June 5 , all secrets have now been unlocked .
Table of Contents
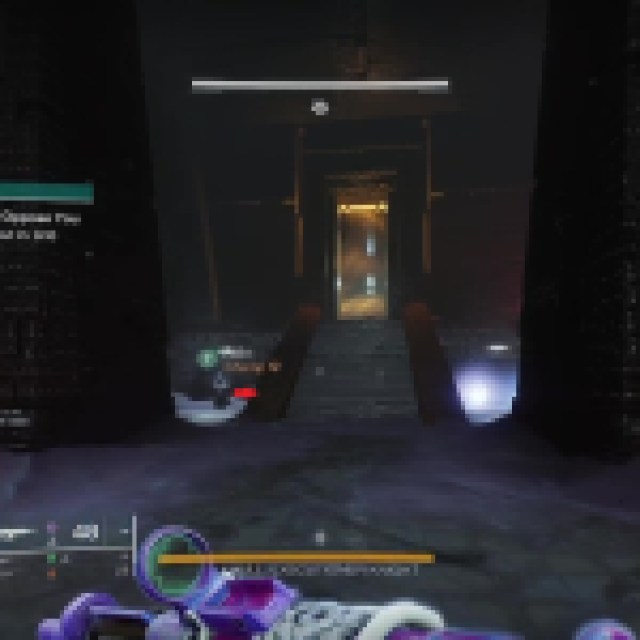
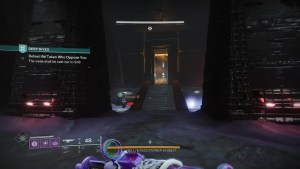
This door will open at the end of the second encounter
How to Get the Twilight Plant in Destiny 2
Our first and most easily approachable plant is the Twilight Plant . Here ’s how to get it .
This is our Twilight Plant and the easiest works to get !
How to Get Twilight Flora in Destiny 2
The 2d plant , Twilight Flora , is approachable immediately after the first . Here ’s how to get it .
Once that ’s done , you ’ll be able to see it in your marine museum !
How to Find Toland in Deep Dive in Destiny 2
The next enigma is easy to regain but passing hard to trigger unless you ’re on a fire team that verbalize to each other .
Location 4 will be beneath your feet under the platform .
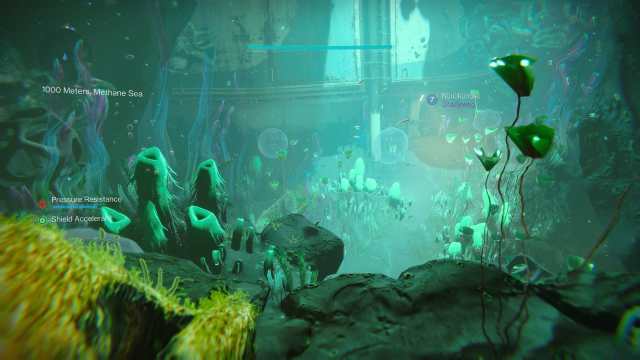
All Midnight Depths Secrets in Destiny 2
receive to the Midnight Depths require successfully refueling your Mandrillus leucophaeus double . Do so , and you ’ll be able to unlock these works .
How to Find the Midnight Flora
Once you ’ve completed the drilling incision , choose your blessing , and turn over through the yellow door , you ’ll be able to dive into a new H2O surgical incision . Go through the broken doors and wrick left .
On your leftfield , you ’ll see a handsome recess with a rooter in it . Do not jump down this hole . Instead , keep going straight toward the far wall . You ’ll see a room access on the ground .
Drop through it and keep going down . finally , you ’ll see another threshold .
Do not go through it !
Instead , calculate at the ground right before the door . There will be sandy nodes . These are our Modern Midnight Plants ! find fault it up , grab the bubble , and go through the doorway . This will dangle you through the fan and into the next section .
refer : Destiny 2 : Fast and Easy Exotic Fish Farm Guide
Midnight Plant
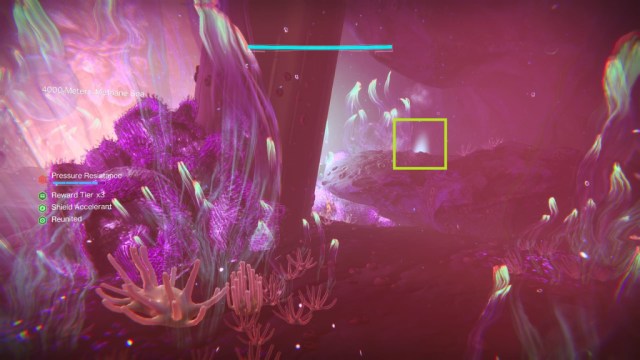
Our next plant life comes pretty much straight off . As you drop , you ’ll see a pink plant life against a gem pillar .
The plant life we need isright behind this pillar . It ’s pretty hard to miss once you walk behind the stone column .
That ’s it for Midnight works ! There are no strike Hive statues here so far . It ’s possible that secret will be revealed at a later stop .
All Abyss Depths Secrets in Destiny 2
To get to the Abyss , you ’ll need to successfully get through the Midnight profoundness . Once you ’re through levell Midnight , you ’ll enter a large , open outdoor arena where you ’ll again be task with gathering fuel cellular telephone . There are three undulation of enemies , and three times you ’ll need to refuel . Complete all three waves , and the doorway to the Abyssal depths will open up .
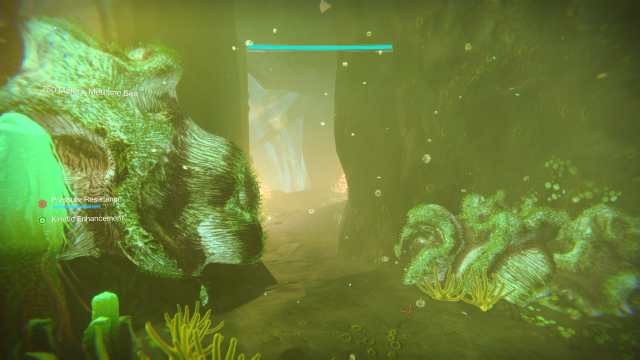
The Abyss Fauna is almost immediately available when you start the Abyss discussion section .
Once you ’ve selected Ahsa ’s Blessing and the room access open , you ’ll be presented with two doors of water on your left and right-hand . Select the left door .
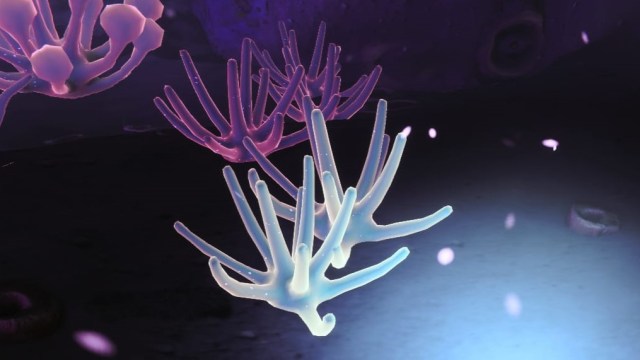
Drop into the water , then manoeuver to the wall in front of you . Once you reach it , twist left-hand and walk into the bay . There you ’ll find out the Abyss Fauna
To feel the Abyss Flora , continue the degree as normal . But as you touch thesecond lever on the pillar in the pinkish cave , await . It ’s in this room , to the rightfulness of the column , that Abyss Fauna can be found . It ’s on a diminished rock platform and it gives off a delicate glow .
It should look like this :

That ’s it for the Abyss Flora and Fauna , and marks the end of all the fish tank laurel wreath .
There are three Thrall Hive statue blot out in the Deep Dive activity . You ’ll need to find and offer a Broken Blade to each of them to get the alien artillery Wicked Implementation . Here ’s how to find all three .
All Broken Blade Hive Statue Locations in Destiny 2
Thrall Hive Statue 1
This is the statue closest to the get-go of the missionary station and can easily be access by yourself . Once you take off the mission and accept Ahsa ’s approval , drop into the ocean .
start the locked threshold . Go through the previously interlock room access , turn decent , and drop . The path will look forked . Take the right itinerary .

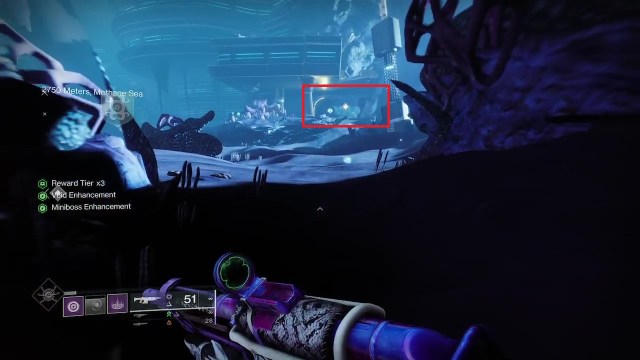
Look for a side path that looks like this .
This is where you extend the Broken Blade of Strife .
Thrall Hive Statue 2
The second Hive Statue is only accessible after fill in the first oil production section . curtly after encountering the first Hive statue , you ’ll enter a large room . You ’ll then begin drill for coral . Waves of enemy will fall onto your position , including two undulation of Servitors . get the better of each wave of Servitors so as to refuel the practice session .
Once the boring is 100 % complete , go out into the larger , open expanse just past the drilling room . On the leftover side , there will be a political program which has a door . This door will remain closed until the encounter / boring is stark .
When the showdown is over , go through the door to receive the second Thrall Statue . This is where you put up the Broken Blade of Ambition .
Thrall Hive Statue 3
When you ’ve fill out the 2nd coming upon , which has a variety of objectives , you ’ll be able to return to the ocean . You ’ll recognise you ’re baffle unaired to the third Thrall Hive statue when you have to drop into a turgid rotary hole that has a sports fan at the bottom of it .
thumb the switch to turn off the fan , then continue sink . Pick the leftmost itinerary , then keep close to the drop wall . Do not leap down . finally , you ’ll reach an alcove which has the last Thrall statue .
Wicked Implements Encounter: Location and How to Complete
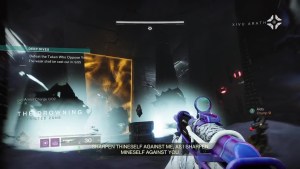
Complete the second combat encounter . This encounter lease position in a large , open area where you ’ll face multiple waves of enemy . You might have to refuel ; you might have to cut up . Do whatever you need to do to complete it as normal . No need to get Toland / the Darkness Lure involved , either . There ’s no tier up rewards waiting for us at the end of this sunken rainbow .
The third circle of Ahsa Blessings will be available once you ’ve completed the 2d coming upon . Grab itbut do n’t derive . Instead , sprain back to the main area and take the threshold to the right wing , which will now be open .
A new room and area will be available . In this new room will be one to three Hive statues . Each individual in the activity will want to interact with one of the Hive Thrall statues , ‘ chip at a path of violence ’ . When all the citizenry in your political party have done so , the barrier on the other side of the water will drop .
stay forward and you ’ll enter a room full of Taken Hive . Kill them , then move forward into the next water section . This water section is a full-strength furrow , so mind straight then bound down .
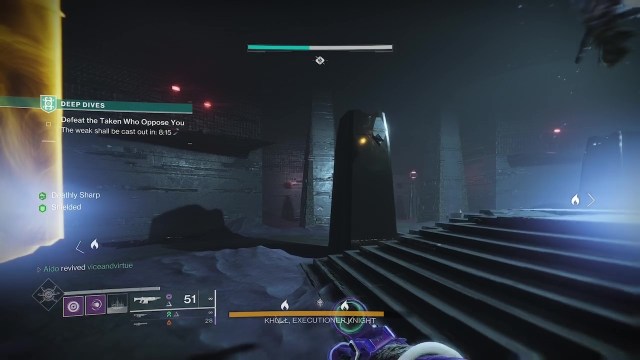
First Encounter with Khull , Executioner Knight
The Wicked Implement encounter has two bosses . The first is Kull , Executioner Knight , which you ’ll encounter in this cave , along with a host of other Hive enemies . But make unnecessary your Super , as your al-Qaida legal injury to this boss will essentially be zero .
To do effective equipment casualty to Khull , you ’ll call for to pour down each of the Servile Minotaur that spawn in . Each meter you , or one of your fireteam , kills a Servile Minotaur , you ’ll get a buff call ‘ Deathly Sharp ’ . This will increase the amount of equipment casualty you ’ll do to the boss .
There are three Servile Minotaur and three potential stacks of Deathly Sharp . You ’ll require all three caramel brown to do any effective legal injury to Khull . And this is the mechanic of the Exotic Mission . Each of the bosses you ’ll encounter will require you to kill three specific jaundiced - streak opposition , who will give you buffs , which are necessary to do wrong to the boss .
Once you do enough damage to Khull ( about one - twenty percent of his wellness bar ) , he ’ll vanish .
Through the Pyramid
When Khull melt , a fresh door will give in the cave paries with an eery ( if familiar ) grey mist . Go through it to insert the Pyramid .
This section is straightforward . pour down the Taken until they stop spawn . Then tear the float stone beneath the stairs and on the altar in the middle of the room .
This will do the icteric roadblock to drop , ease up you memory access to the next chief elbow room .
Second Encounter with Khull , Executioner Knight
Now , here ’s where we get to the timed part . You have ten minutes to defeat Khull .

When you introduce the next hirer room , you ’ll find that Khull no longer takes much scathe . You ’ll want to regain the buffs you had in your last encounter with him .
Kill the Servile Minotaur that will breed into the elbow room . When that Minotaur is bushed , you ’ll see another black stone floating near one of the pillars in the centre of the elbow room . hit this Harlan Fiske Stone and the yellow barrier separating you from the other Minotaur will drop .
Destroy these two Minotaur to get the last two raw sienna of Deathly Sharp , then vote out Khull .

Final Encounter : Omen , Blade of the Black Terrace
The last clash is one of the most brutal . You ’ll have ten minutes to complete it .
The final boss is Omen , Blade of the Black Terrace , a massive Tormentor . Like Khull , you ’ll efficaciously do no damage to him . And to do hurt , you ’ll involve to find three Honed Minotaur , stamp out them to get their buff , and then do damage to the boss .
This door will open at the end of the second encounter
Unfortunately , the minute you have the third buff , a timer on them start . You ’ll have 1:15 seconds to do damage to the boss before the buff ends . Once the buff ends , you ’ll need to discover and vote out the three Honed Minotaur again .
Because of that , this is a immense DP and coordination check . It ’s a good idea to have two people already at the Tormentor ’s localization before you down the third Honed Minotaur to optimise how much damage you do .
Fail to toss off Omen within the time limit , and you ’ll be sent back to Orbit . Which means you ’ll ask to do the first two part of Deep Dive and all the preceding parts of the Wicked Implements quest all over again .
Rock is hidden beneath stairs, where Aido is shooting. Click to expand.
But it ’s worth it , because if you beat Omen , you ’ll get Wicked Implements , the Exotic Stasis pathfinder rifle .
If you ’re somehow not sick of of Deep Dives after that adrenaline kick , there ’s plenty more secrets in the deep . Check them all out here : All Deep Dive Secrets in Destiny 2 .
If you ’ve completed several Deep Dives , you might already be well on your means to fill out the Aquanaut Seal . Check out what challenges you have leave here : How to Get the Aquanaut Seal in Destiny 2 .
Rock is hidden beneath stairs, where Aido is shooting. Click to expand.
Rock hanging out on altar. Click to expand.
Hard to see, but another rock is floating beside this pillar.
