Focus , focus , focus .
The final installment of Life is Strange will have you on the edge of your rear , in all probability with a tissue in your hired man . The picture taken really do meditate what Mr. Jefferson was saying in his class at the start of the game : life is … weird .
Much like all of the episode that have follow before , Polarized has 10 picture to capture . Here is how to take them .

Photograph 1
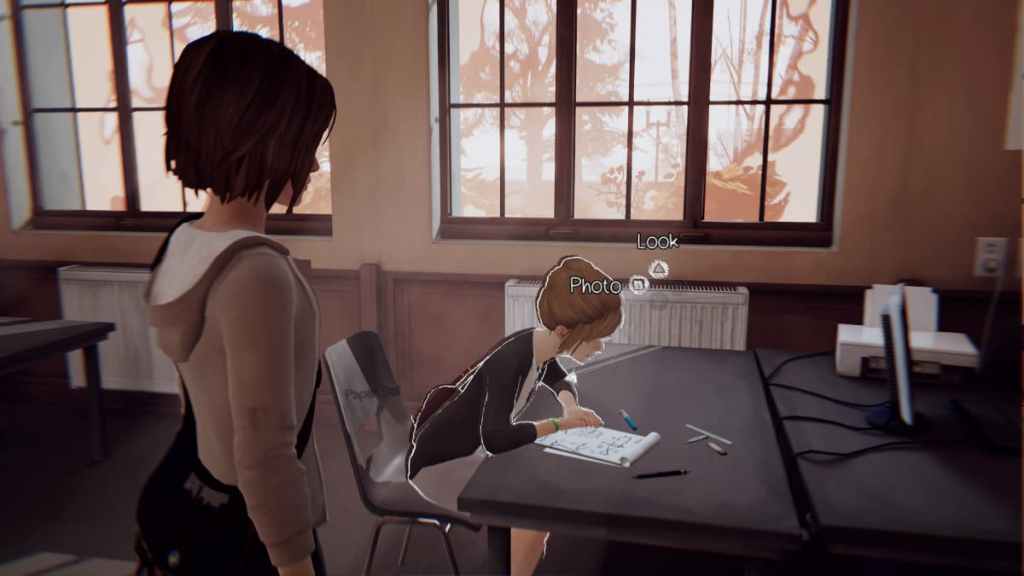
The first photo will be available once you escape Mr. Jefferson ’s torture bunker . When you come alive up in class again on that fateful first day , hold off till you are free to wander . Then , head over to Kate Marsh .
First , you will demand to comfort her , and this will lead Max to differentiate her that everything will be alright , given what she make love about the site . After the conversation , you will be capable to take a side - visibility scene of Kate .
Photograph 2
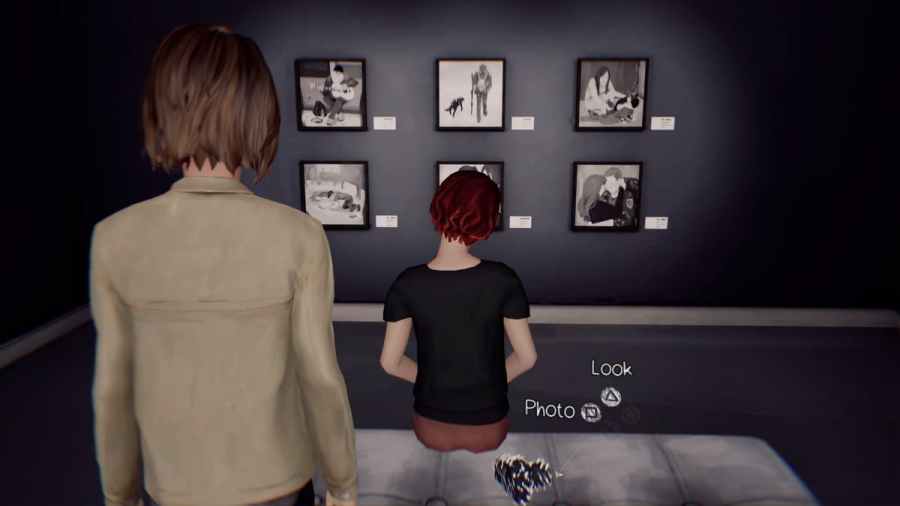
The 2d photo is accessible once you bring down in San Francisco at the art gallery . alternatively of heading up the stairs , go down the curt steps into what seems like a petty sub - gallery cave that ’s off of the footing floor from where you infix .
Stand behind the red - haired char for a chance to take a photo ( which , quite frankly , is a bit strange , as it is n’t even Max ’s photographic camera . Bad Max ) .
Photograph 3
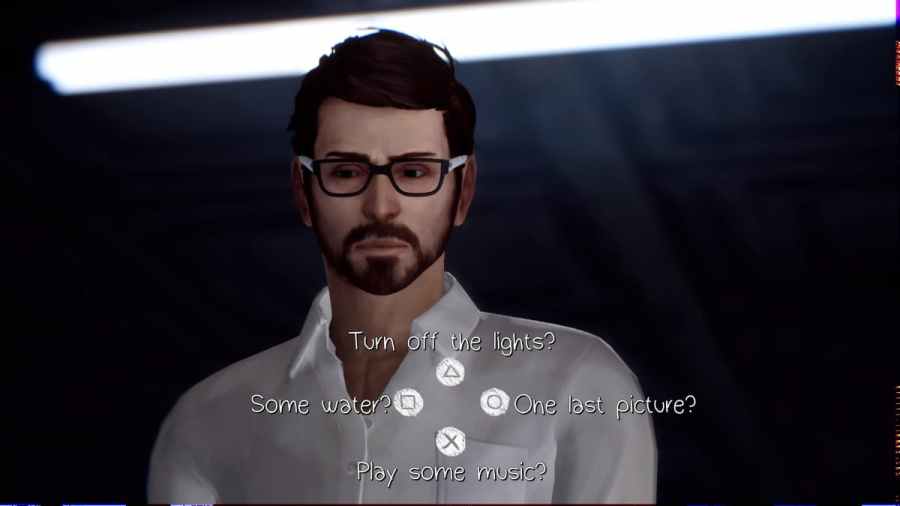
When you ’re back in Jefferson ’s lair , you will ask to rewind when he goes off to check the photos he just engage of Max . When he total back , examine to procrastinate him by asking for a last request .
To get the picture , you need to opt theOne Last Pictureprompt , and you will then hit the achievement . If you are stuck and want the right choice to progress the story , you need to break up theSomeWateroption .
touch on : All achievement and trophies for Life is foreign Remastered
Photograph 4
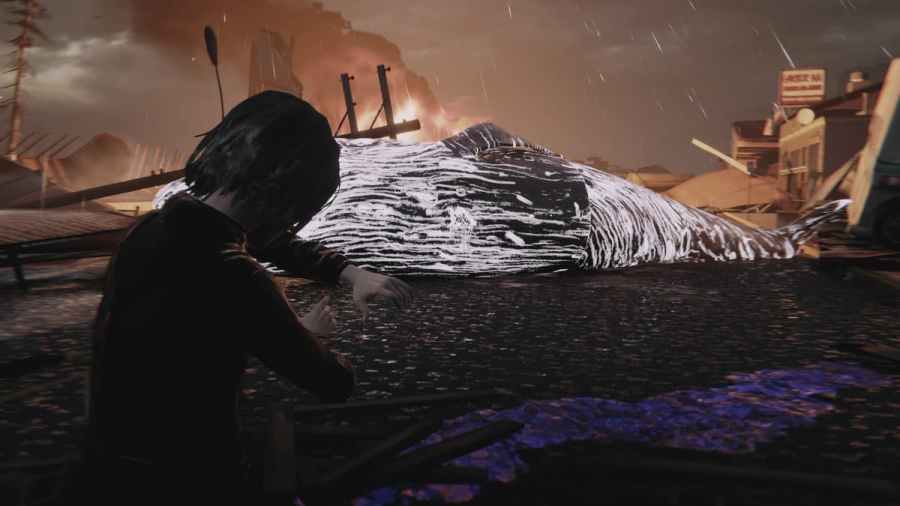
When you go to the buffet car to amass the photo from Warren , you will be come across by the chaos of the storm . Work your fashion through the detritus until you get to an porta in a building on the left over - hand side . You will need to put out the flame and save the human beings .
Once you have done that , exit through the windowpane and channelise toward the Two Whales Diner . There will be a stream of gasolene flame make their way toward the diner . Stop them by using theSandnear the entrance . you could then take a pic of the giant in the centre of the road .
Photograph 5
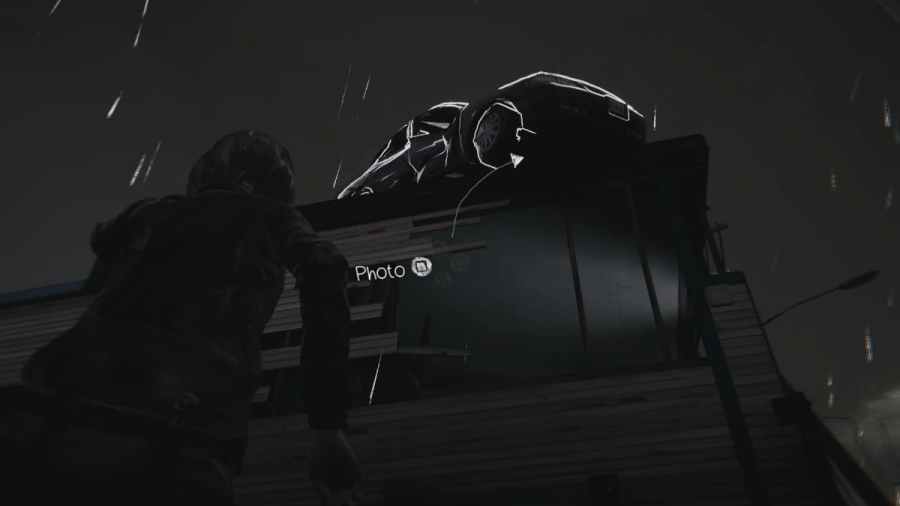
After taking the photo of the hulk , turn around and look at the top of the construction next to the Two Whales Diner . You will see a car precariously hanging over the edge . stick out skinny enough , and you will be invited to take a photograph of it .
Photograph 6
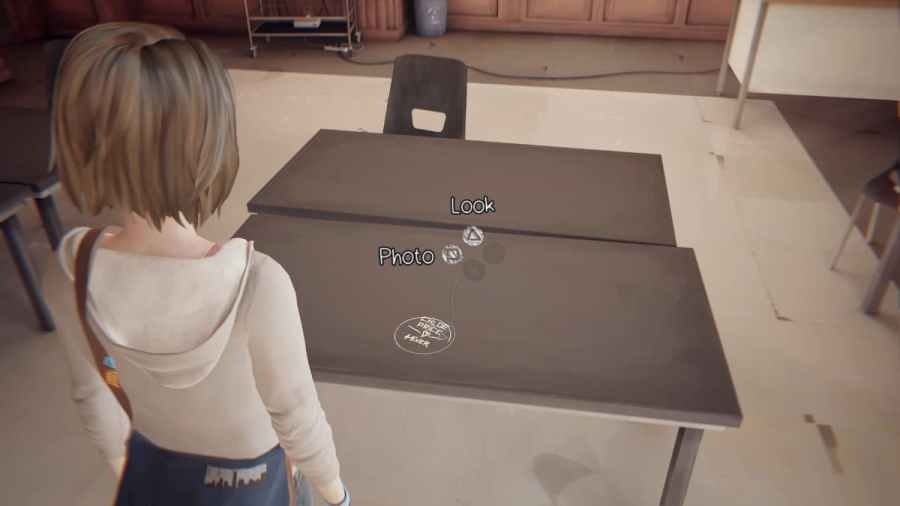
When you have run back in time again , walk up to the same desk from the first episode that has the Rachel Amber etching on it . Lookat the graffito and let it bicycle through until it readsChloe Price 4 Ever . You will then be able to take a pic of your BFF ’s name . Cute .
refer : All pic localization in Life is Strange Remastered – Episode 1
Photograph 7
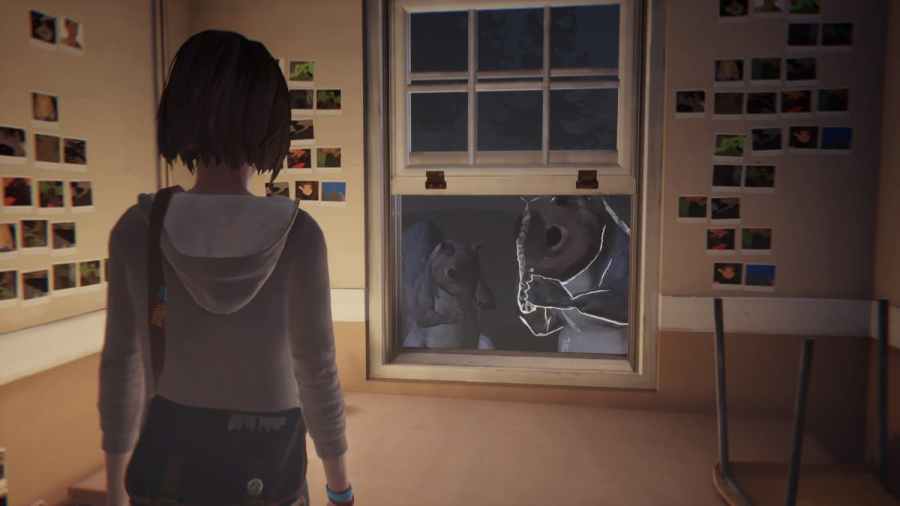
You will end up in a Silent - Hill - dash maze of Blackwell ’s girls dormitory . Keep going through the room access until the walls are plaster with polaroid photos . When you get to this stage of the maze , head down the ripe - hand corridor near the girl shower room .
You will see that the squirrel duo from before are now jacked and big boys . Get nigh to the windowpane for the chance to take their photo .
If you are stuck at this point and ca n’t seem to reach the part when all of the photograph are on the rampart , you first need to recruit Victoria Chase ’s elbow room when appear as Victoria , herself .
Then you will want to check the mapping near the dormitory ingress when wearing Rachel Amber ’s wearing apparel . It will tell you which way was hers .
Photograph 8
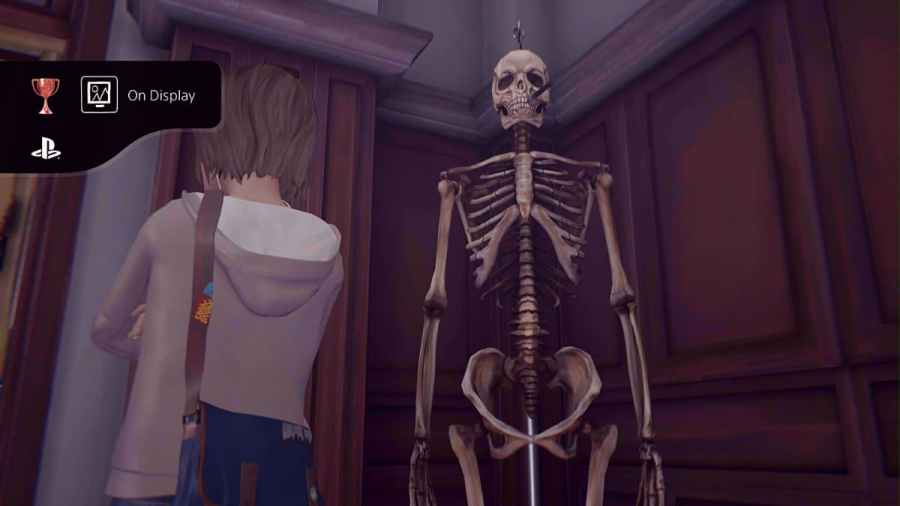
For this one , you will keep abreast the path to the lav from the first episode , except everyone will be lead backward ( yes , backward ) . Before observe Rachel ’s doe and proceed into the bathroom , look to the proper - hired hand turning point by the yellowed doorway . You will see your skeleton crony there again .
Walk up to him , but instead of the conventionalTake a Photoprompt , you will just see the option toOpen Your Journal . Do this , and in a backward mode , you will have taken the photograph for your compendium .
Photograph 9
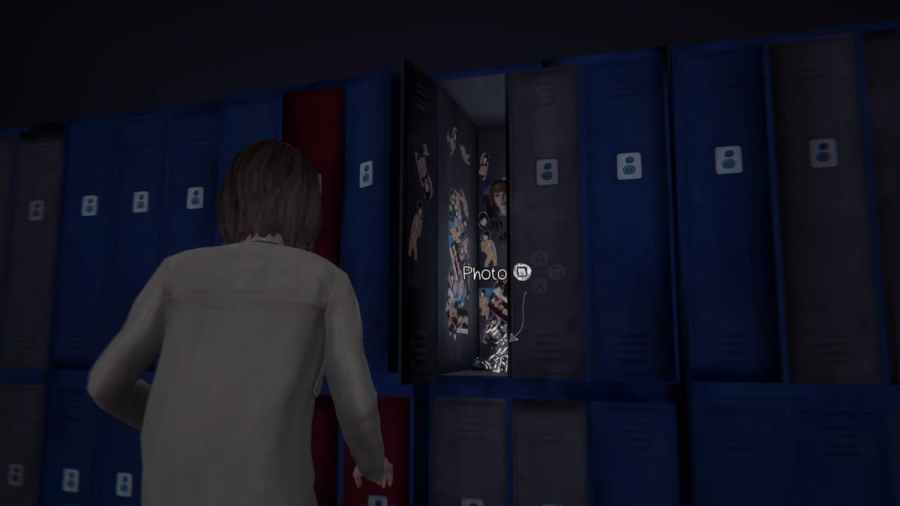
you could easily get lost in this one , but it is n’t too difficult . When you reach the storage locker section of the sentry story ( while all of Blackwell is hunt you down with flashlights ) , keep to the right - manus side .
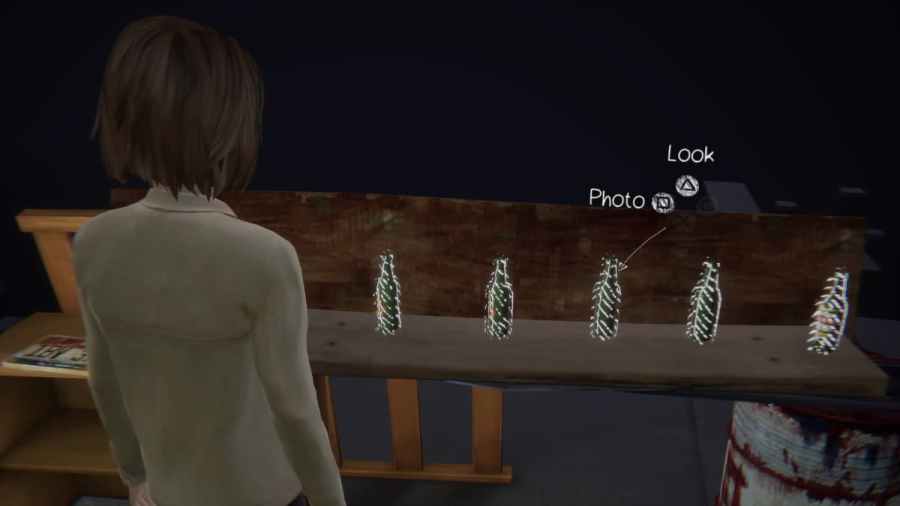
Photograph 10
In the surgical incision after Principal Wells is a freehanded , light sentry , you will take to pull in five bottle . amass all five from around the obstruction , and head to the end of the path where you will see these bottle trace up . Get up close to shoot a picture of the clinking , unripened container .
And with that you , will have all of the trophies / achievement from taking all optional photos within the game ! We trust you enjoyed the experience , as well as the storyline .
neglect some of the other photos from the previous episode ? Not to worry , check outAll of the photograph chance from Life is Strange - Episode 4 : Dark Room .