favored every cervid you could find !
There ’s no shortage of collectible in Alan Wake 2 , and here ’s your templet to check you do n’t escape a single one . Here ’s how to regain all the Return 1 : Invitation Collectibles in Alan Wake 2 .
All Collectible Locations in Return 1: Invitation in Alan Wake 2, Listed
I mean it when I say there are a lot of collectibles in Alan Wake 2 . And you could begin finding them as early as the first chapter of the biz . I ’ll list collectible associated with trophies and collectable that will clear you some fantabulous bonuses and loot for Saga .
repay 1 : Invitation has the next collectibles :
That ’s a grand total of 16 collectable ! I ’ll be doing this in chronological gild so you may accompany this guide as you play through the chapter .

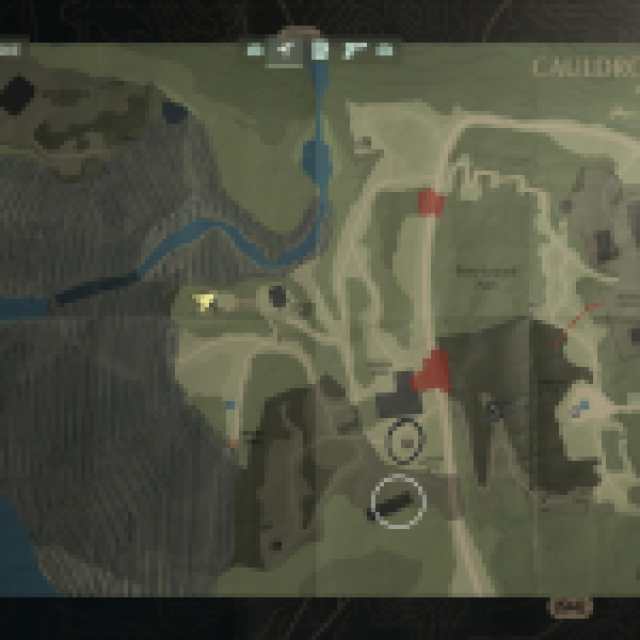
Collectible 1 – The Cauldron Lake Map (1/3)
You ’ll get the Cauldron Lake map presently after the cutscene when you arrive at the gravel parking lot . The tutorial will really labour you to pick up this map . In fact , you may have no pick but to do so . This might be the most utilitarian collectable of the chapter , so be certain you ’ve added it to your ingathering .
Collectible 2 – Mortar Falls Lunch Box (1/6)
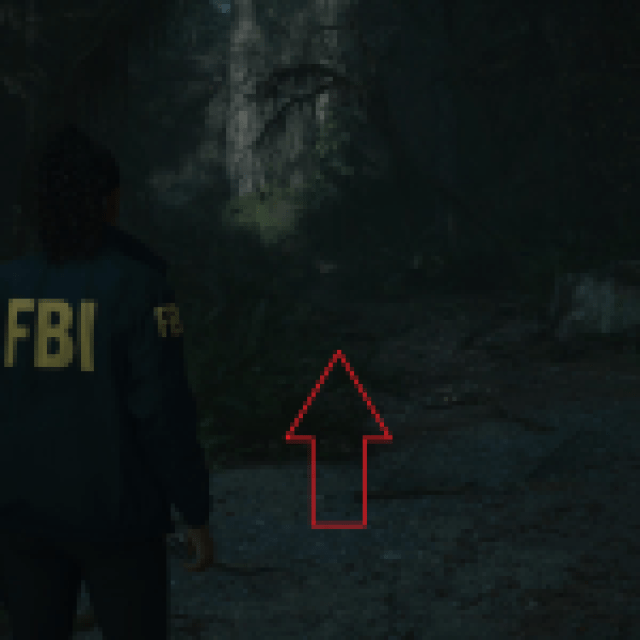
For the lunch boxes , I ’ll be going counterclockwise to cut how much turn back we ’ll involve to do . After speak to the police officer at the trap in the fence , come after Casey down the path towards the execution site . You ’ll stand out down a shelf where the stairs have broken . extend down the way of life .
Casey will turn left , but do n’t follow him . Instead , continue fore and takethe second left .
This will lead you to a dead end which has the Mortar Falls signboard . To the left of this planetary house , conceal in the bush , is our first Lunch Box .

Screenshots by Prima Games
Collectible 3 – Witch’s Hut Lunch Box (2/6)
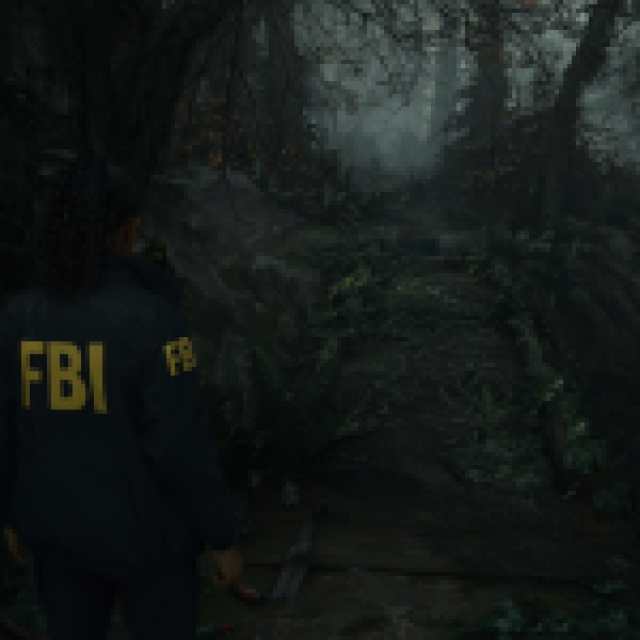
From Mortar Falls , follow the nearby lead . Keep right at the first fork , and then continue until you ’ve dispatch a crossroads . Of course , a Witch ’s Hut would be near the crossroads ! Take the westmost route , and you should see the Witch ’s Hut . We ca n’t do anything with this locating yet , so continue past it until you find a natural bridge .
This bridge will lead to a lookout with some death chair and some trash . Stand in front of the chairwoman and face frontward as if you were sitting in it .
From this position , head consecutive , and you ’ll find a lunchbox cover in the George Walker Bush .

Screenshots by Prima Games
Collectible 4 – Abandoned Camp Site Lunch Box (3/6)
From the lookout man , go back across the bridgework and forefront to the south . You ’ll hit an abandoned campsite . discover the firepit and go past it and the magazines to line up the third tiffin box .
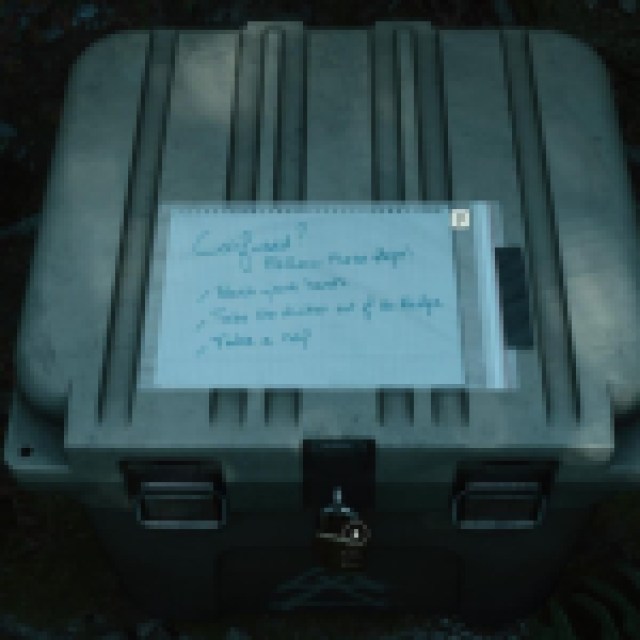
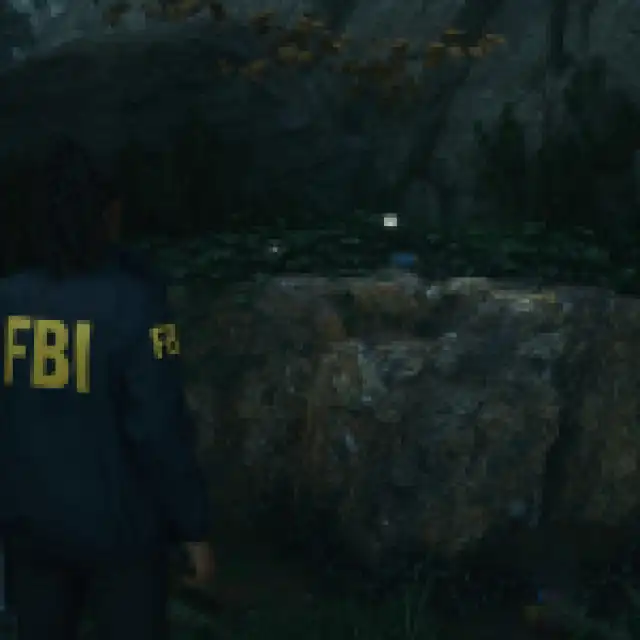
Collectible 5 – Cult Stash (1/1)
From the abandoned campsite , we ’ll need to manoeuvre towards the murder internet site . Take the eastmost trail from the abandoned campsite , and you ’ll find yourself at the trailer .
In front of the preview , wedged between the table , is the first Cult Stash . You ’ll need to figure out the puzzle tap to it to afford it . Or you could just read our template if you want the answer fast .
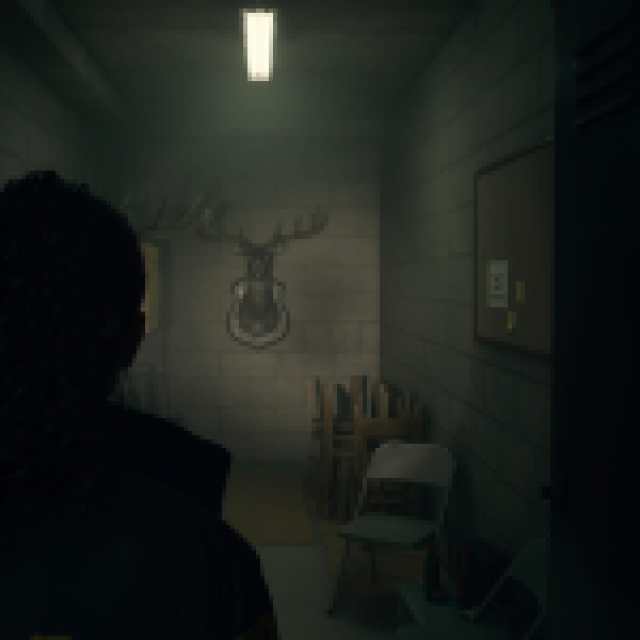
Collectible 6 – Cult Trailer Deer Head (1/3)
For our deer head , you ’ll take to head inside the dawdler . Immediately turn left and go into the room . There on the wall will be the cervid head . You must interact with the cervid head for it to be count towards Saga ’s sum .
Collectible 7 – General Store Dead End Lunch Box (4/6)
Now that we ’re done with the edges , we can head to the Murder Site . Once you get there , you could opt to ignore the investigation . They ’ll wait for you .
Collectible 8 – FBC Lunch Box (5/6)
You ’ll only be able-bodied to obtain this lunch box after you ’ve completed your interrogation of the eubstance and the police officer hands you the shortcut headstone . Once you have the shortcut key , head through the locked threshold in the fencing just past the murder site and worldwide memory board .
Casey will head straight there if you ’re struggling to find it .
Collectible 9 – Koskela Brother’s Lodge Commercial (1/3)
You ’ll be able to access this commercial message after you get into the car and regress to Bright Falls . Once you ’re in Bright Falls , you ’re free to roam around some of the town , including the Lodge . The lodge is the log building forthwith to your left when you stretch in .
Supposedly , this commercial will play when you essay to bequeath the building . The television is in the main entry room . It did n’t work for me . And if it does n’t play for you , do n’t sweat it . You ’ll come into the gild in late chapters , so you ’ll have other opportunities to strain and get it to initiation .
If the commercial does flirt , think to interact with the television .

Screenshots by Prima Games
I mistrust you may actually only get two Koskela Brothers Commercials in Chapter 1 , but I ’ve listed all three locations just in character .
Collectible 10 – Lodge Deer Head
Once you enter the gild , turn the right way and enter the dining room . Go to the back , then turn left at the bar .
You ’ll find the deer on top of the open fireplace immediately in front of you . Remember to pet it .
Collectible 11 – Bright Falls Map (2/3)
There are really two localisation for the Bright Falls single-valued function . But the closest option is on the left side ( if you ’re looking at the entrance directly on ) of Oh Deer Diner . It will be outside of the diner , beside the telephone booth .
The second option is to grab the mapping on the outside of the sheriff ’s role , to the right of the entry .
Collectible 12 – Oh Deer Diner Deer (2/3)
You ’ll have to put down the diner for plot of land purposes . In the far back right , close to where you ’ll find the witnesses , is a hall that lead to the bathroom .
Enter the hall but immediately call on right . You ’ll find a door that will open into a provision closet . To the left hand will be the final deer .
Collectible 13 – Koskela Brother’s Oh Deer Diner Commercial (3/3)
This commercial message will wreak if you approach the television inside the Oh Deer Diner . The television is locate on the leftover side rampart , almost like a shot after you enter . It ’s close to the cap .
You may involve to return to the Oh Deer Diner after speaking to the Bookers to trigger this commercial . It did n’t play for me until after I ’d go to the sheriff ’s office and completed the inspection on Nightingale .
Collectible 14 – Bright Falls Park Lunch Box (6/6)
Across the road from Oh Deer Diner in Bright Falls is a park .
It ’s quite modest , and you should see a summerhouse at the far end . Approach the summerhouse , but before you get to it , head right .
Beneath a tree to the right of the summerhouse ’s entrance is the final lunch boxful .

Screenshots by Prima Games
Collectible 15 – Sheriff’s Office Map (3/3)
After you enter the sheriff ’s office , you should see a front desk in front of you . you could enter this partitioned room and seize the mathematical function that ’s hung against the bulwark . It ’s the vividness of old parchment , slightly beige - yellow .
Collectible 16 – Koskela Brother’s Sheriff’s Office Commercial (3/3)
This is one of the few missable collectable in the game ! So , be sure to get itnowor during Saga ’s reappearance 3 : Lost Girl chapter . After that point , you ’ll never be able to trigger it again .
After get in the sheriff ’s spot , turn left . If you ’re follow the chapter patch and are here to essay the dead body , you should see Casey standing at the far conclusion of the hall . Go into the 2nd door on the left .
Approach the television on the ripe wall . A Koskela Brothers commercial message should start playing .
Screenshots by Prima Games
Interact with it , and you ’ll have it tally for good to your collecting .

Screenshots by Prima Games

Screenshots by Prima Games

Screenshots by Prima Games
Screenshots by Prima Games

Screenshots by Prima Games
Screenshots by Prima Games

Screenshots by Prima Games

Screenshots by Prima Games

Screenshots by Prima Games

Screenshots by Prima Games

Screenshots by Prima Games
Screenshots by Prima Games

Screenshots by Prima Games

Screenshots by Prima Games

Screenshots by Prima Games

Screenshots by Prima Games

Screenshots by Prima Games
Screenshots by Prima Games

Screenshots by Prima Games

Screenshots by Prima Games

Screenshots by Prima Games

Screenshots by Prima Games

Screenshots by Prima Games

Screenshots by Prima Games

Screenshots by Prima Games

Screenshots by Prima Games

Screenshots by Prima Games

Screenshots by Prima Games

Screenshots by Prima Games
Screenshots by Prima Games

Screenshots by Prima Games

Screenshots by Prima Games

Screenshots by Prima Games

Screenshots by Prima Games

Screenshots by Prima Games

Screenshots by Prima Games

Screenshots by Prima Games

Screenshots by Prima Games

Screenshots by Prima Games

Screenshots by Prima Games

Screenshots by Prima Games

Screenshots by Prima Games

Screenshots by Prima Games
