Brute Bomber is the boss of AAC Light - behemoth M3 Savage in Final Fantasy XIV Dawntrail , and this foray has some explosive mechanics that can easily lead in a wipe .
The Arcadion feature some of the good fights in all of Final Fantasy XIV , and the first Savage tier of the Dawntrail expanding upon is no joke . AAC Light - heavyweight M3 pit musician against Brute Bomber in a fairly straightforward combat , but a individual fault can be virulent for an entire company .
Table of contents
How to unlock AAC Light-heavyweight M3 Savage in FFXIV
You ’ll unlock AAC Light - heavyweight M3 Savage in Final Fantasy XIV as shortly as you unlock the AAC Light - heavyweight Savage grade of the Arcadion raid series . All fourSavage AAC Light - heavyweight raidsunlock at the same time . After finishing the normal difficulty questline for the AAC Light - whale level ( culminate with The Neoteric Witch quest ) , you’re able to speak toGabbro ( ex : 22.3 , Y : 17.1 ) in Solution Nineto unlock the Savage version of these four fights .
All AAC Light-heavyweight M3 Savage mechanics explained
The Savage translation of AAC Light - giant M3 reprocess a great deal of mechanics from its normal vis-a-vis , but the intensity is ramped up to 11 . Brute Bomber ’s attacks pack a mighty punch and can well kill you in one or two hits , so you ’ll have to play dead unless you want your healer to hate you .
Recommended M3S Markers
We urge placingmarkersat clock spots for this competitiveness to make thing easier . you may refer to the waymarks to dodge sealed onset more easily . See the image above for the in effect arrangement .
Opening Phase
The fight begins like most do : with a raid - wide . Brute Bomber castsBrutal Impact , which is a forcible maraud - wide onset ( toss off Feint to give your healers some breathing room ) that hit a total of four times . Immediately after , he ’ll useKnuckle Sandwich . This is another four - remove attack , but it ’s a armored combat vehicle buster that must be shared by both tanks .
Lariat
Lariatis the first basic shop mechanic of this fight . Brute Bomber will useeither Quadruple or Octuple Lariatand perform acircular AOEdirectly underneath him before launchingconal AOEsat the party .
These AOEs must besoaked bypairs of players if Brute Bomber used Quadruple Lariator theparty must go around out equally if he used Octuple Lariat . If it ’s fourfold and you need to pair up , just head to marker A / B / C / D. If it ’s Octuple and you need to spread , have one party member standpoint on each marking . If you mess up this mechanic up , you ’ll brook from a Physical Vulnerability Up debuff in addition to take heavy scathe .
Dive
Brute Bomber will performeither Octoboom Dive or Quadroboom Diveimmediately after the Lariat . He ’ll jump to the border of the arena and dealproximity damageto the entire company , so move aside from him .
count on the attack , you ’ll need to either spread or pair up . Octoboom signify distribute , Quadroboom have in mind pairs . After this , Brute Bomber will cast the raid - wide Brutal Impact once more to transition to the next phase of the fight .
Barbarous Barrage Phase 1
Barbarous Barrageis the first real mechanic of this fight . Just like in the normal interlingual rendition of M3,knockback towerswill engender throughout the sphere . This time , however , each knockback must be hock by a sure number of participant and you ’ll have to slant the knockbacks so you’re able to hit every towboat in succession .
Split your group into light parties of four . Two sets of three knockback towboat will breed on either the magnetic north / south or east / west side of the arena . Each of them has a Seth of black orbs circle them that denote how many players require to stand in each pillar .
To solve this grease monkey , send four players to the middle towerssince they take four people each . Then , angle the knockbacks so that apair of playersfrom each radical is criticise back into each of the four remaining tower in thecornersof the arena . The box tugboat will blow up shortly after the center one , so you have to use the knockback from the heart blast to move the brace to the corners . There ’s no time to hunt if you mess up the angle .
While everyone is getting knocked around , afinal pillar will engender in the center of the arenathat must be soaked by all eight political party members . employ the knockback flack from the corner towers to get everyone back into the heart . As you all soak the middle tower , Brute Bomber will start to castMurderous Mist . Move forthwith behind him to dodge it just like in normal musical mode .
Doping Draught
For the next part of the fight , Brute Bomber will return to the center of the arena and castDoping Draught . After drinking the banned energy drink , his Lariat and Dive attack will be modified .
If Brute Bomberglows with orange fire , the followingLariat attack will be a donut - shaped AOE . Otherwise , it ’ll be the standard Lariat with a circular AOE directly underneath the boss . Regardless of whether you fudge by going in or out , though , the political party still needs to eithersoak or spreadfor the conal AOEs that come .
Diveis up next . Brute Bomber will leap to the edge of the arena like normal , but if he ’s burn with orangish flames , the wallop willknock the party backas well . The usual cattle farm mechanic occurs irrespective of the glowing , though , so check that the political party either spread out out or pairs up depending on the name of the attack .

Image: PC Invasion
To shut down out this phase , Brute Bomber will execute asix - hit Brutal Impact raid - wide followed by asix - hit Knuckle Sandwich duo tank car fellow . He ’ll then castTag Teamto create clone of himself to transition to the next form of the raid .
Chain Deathmatch Phase 1
Once both ringer have been produce , Brute Bomber will castChain Deathmatch . Thistethers one clone to youwith a imperial concatenation . To go this mechanic , you mustget hit once by the clone that you are tethered towhile parry the attack from the second clone .
The clone will execute Lariat Combos that hatch half of the arena . After getting hit once by the clon that you were tethered to , the Chain Deathmatch debuff will be remove . Lariat Combo is a two - hit tone-beginning , though , so watch out for the clones as they come back around the second time .
After Chain Deathmatch , Lariat will be cast yet again . Remember , if Brute Bomber glows , then the AOE will be a sinker that you dodge by belong in . If he does n’t glow , then it ’s a circular AOE that you dodge by go out . Either path , you still demand to copulate up .
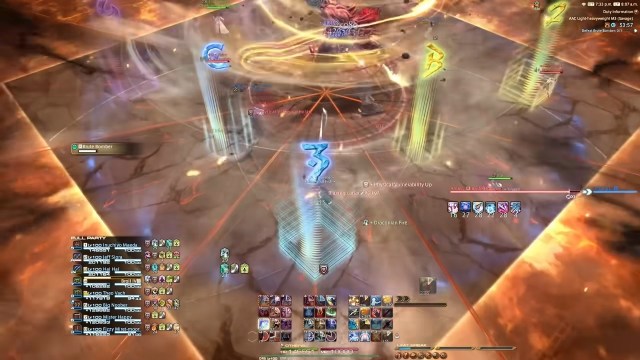
Image: woops
Final Fusedown
A six - hit Brutal Impact foray - wide transition the fight to its next phase where Brute Bomber will castFinal Fusedown . During this attack , two set of bombswill spawn throughout the arena with either retentive fuses or short fuses . Each player will also have a long or unretentive fuse attached to themdepending on their role ( either support or DPS ) as well .
When this mechanic begins , look for the corner of the arena with three retentive - fuse bombs . There will also be asingle farseeing - fuse dud directly across from that corneron the polar side of the bowl . These bomb will blow up last , so thosecorners are dependable for now .
Three of the players will short fuses should head to the big safe corner andposition themselves underneath the longsighted - priming bomb calorimeter , while the 4th histrion should head to the opposite corner of the arena totake tax shelter near the other long - fuse bomb .
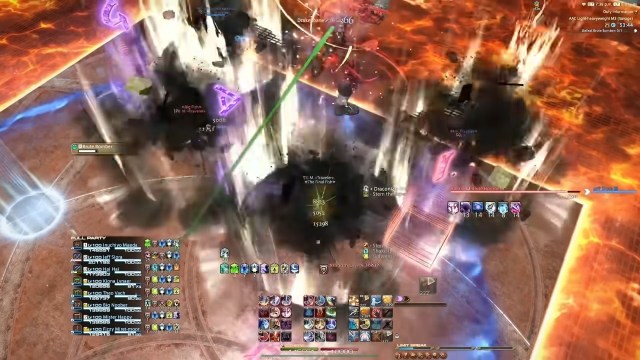
Image: woops
Players with tenacious fuses should wait in the center of the arenato obviate the explosions from the short - fuse players and bombs . After the unretentive - fuse bombs detonate , the long - fusee bombs are up next . The prospicient - fuse musician should move to the now - empty spaceswhere the other bomb calorimeter once were so they can safely blow up , while therest of the party should go to the centerof the arena to dodge the remaining blowup .
It ’s a lot easier to interpret in practice , I promise . After surviving Final Fusedown , Brute Bomber will perform a Dive to transition to the next phase . think back , if he radiate , there ’s a knockback added to the onset . Remember that Quadroboom Dive have in mind to match up and Octoboom Dive mean to circulate
Fusefield
Fusefieldis the big new auto-mechanic for the Savage version of this fight , and it ’ll take some coordination with your party member to outlast . During this phase , primer lineswill appear in clock dapple surrounding Brute Bomber . Each participant will receive a debuff timer with either 45 mo or 23 secondscounting down .
Theplayers with the shorter 23 - second debuff should localize themselves along the shorter fuse , while theplayers with the longer 45 - second debuffs should resist on the longer fusee . The finish of this phase is toextinguish each of the fusesbefore the flames reach Brute Bomber . you may defuse the telephone circuit bystepping onto the impinge spark , but doing so will do hugeraid - widely damageand inflict the entire party with a temporaryvulnerability debuff .
Have all the short - fuse player eliminate their sparks first , then let the farsighted - fuse players defuse theirs . Wait in between each defusefor healersto refill everyone ’s HP and for the Magic Vulnerability Up debuff to expire . It ’s up to your party to determine the optimum ordination , but we recommend just goingclockwiseso nobody accidentally defuses at the same clip and wipes the party .
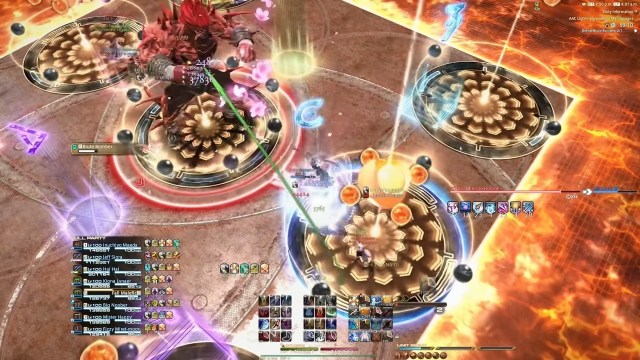
Image: woops
After all priming have been successfully extinguished , Brute Bomber will unleash yet another six - hit Knuckle Sandwich duette tankful buster followed by Doping Draught , which leads into the next automobile mechanic .
Bombarian Special
After salute the banned Department of Energy drink once again and wee-wee himself liberal , Brute Bomber will castOctoboom or Quadroboom Bombarian Special . Both start with a four - hit maraud - wide combo . Then , there will be acircular AOE and a donut AOEthat you dodge by going out and in respectively .
After the doughnut AOE , Brute Bomber will jump out of the field and then leap back down into the centre with aknockback slam . After getting knocked back , the party needs to eitherspread or pair updepending on whether Brute Bomber used the Quadroboom or Octoboom reading of this attack . If it ’s Quadroboom , then it ’s pairs . If it ’s Octoboom , then it ’s a full spread .
Fuses of Fury
Before the next phase angle of the fight , Brute Bomber will castFuses of Fury . This process bomb throughout the arena , but you wo n’t have a fuse attach to you for this one . Just pose yourself near the farseeing - fuse bomb to train for the next shop mechanic .
Chain Deathmatch Phase 2
While the bomb calorimeter are on the field , Brute Bomber will castChain Deathmatchonce more . This time , you ’ll betethered to a clone and the boss at the same time . The same rule applies , however . Justget strike by each of them one timeto remove the Chain Deathmatch debuff .
Both clones will do the common Lariat cleave , but Brute Bomber will put down the disturbance with Murderous Mist in the center of the arena . Murderous Mist will only be cast once but the Lariats hit twice . Get tally by the first Lariat of your chain clonewhile alsostanding in the poisonous AOE from Murderous Mistto resolve this mechanic . Do n’t forget to dodge the Lariats when they come back around , too .
After the knockoff are gone , Brute Bomber will cast Dive . This dole out proximity damage and requires the political party to spread or mate up just like normal . Since everyone got hit byMurderous Mistjust before this , make certain your heals and moderation are on point sincethe pane from that will still be ticking away . The stock Brutal Impact and Knuckle Sandwich combo mark the end of this stage , but with eight hits each this clip around .

Image: woops
Fuse or Foe
The fuze car-mechanic is back once again withFuse or Foe , which places fuses on each actor in the party . There are n’t any bombs to match , but Brute Bomber will castInfernal Spinand begin a hazardous sequence of AOEs .
To start , stand behind Brute Bomber ’s initial conal AOE . After the rotary AOEs go off to each of his face , a pair ofdonut AOEswill follow case . Move to the safe spot in the eye of the unexpended oneto avoid Brute Bomber ’s spinning cones . After the donut AOEs go off , quicklyrun back to the centerof the arena andget behind Brute Bomberto narrowly sidestep the splay cones .
At this point , thedonut AOEs will come backand the actor will short primer should spread out and prepare for detonation . Thesafe space in the snapper of the doughnut AOEs can each fit three playerssafely as long as each of them stands on theA / B/2 or C / D/4 markersplaced within . The remaining two players should direct to thecorners on the border of the arena near 1 and 3 .
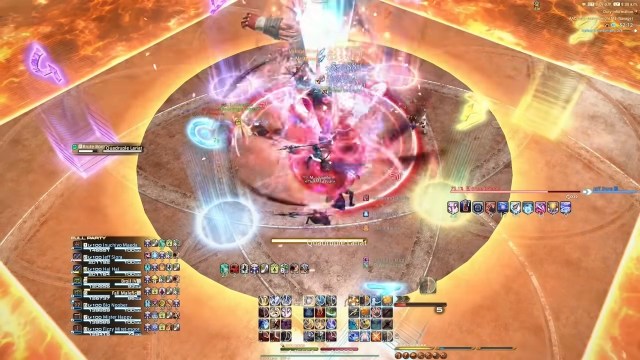
Image: woops
After the short fuse detonate and the doughnut AOEs go off , a brace ofelliptical AOEsin the shape of an eye will come along . Whoever was stick out on marker 2 and 4 should back up to thecorners of the arenato hedge these AOEs . Everyone else should move inward and remain firm onA / B / C / D/1/3to avoid damage .
After the fusee go off , Brute Bomber will vomit up Octuple Lariat . If he ’s burn during this attack , it ’ll become a sinker AOE . The political party also demand to broadcast during this attack . Finally , an eight - hit Brutal Impact raid - wide modulation the conflict to the final phase .
Barbarous Barrage Phase 2
Barbarous Barrageis back once more to tick off the terminal of this fight . It ’s basically identical to its first visual aspect . separate the squad intolight parties of fourand have them sop themiddle towers . Have apairfrom each light company get knocked back into eachcornerso the remaining four towers can get douse . Finally , every pair should utilise the knockback from the corners to recall to the center of the arena so theentire eight - mortal squad can soak the last central tower .
The only mixup this time is Brute Bomber’sLariat , which he ’ll set in motion immediately after the final tower is soaked in the middle of the domain . Turn your camera to keep an eye on him and move to the safe side of the arena to dodge the cleave . He ’ll amount back around with a second Lariat after the first , so do n’t forget that . Enrageis shortly after , so that ’s the end of AAC Light - heavyweight M3 Savage !
AAC Light-heavyweight M3 Savage rewards in FFXIV
Once you exculpate AAC Light - colossus M3 Savage in Final Fantasy XIV , chests will appear with the follow wages depend on how many of your party members have cleared for the week .
There ’s one last raid leave in the AAC Light - behemoth level of the Arcadion , but there ’s still mint of stuff and nonsense to take guardianship of in Dawntrail outside of Savage raid . Make certain you ’re doing yourdaily Dawntrail huntsto stock up on Sacks of Nuts , and do n’t forget to keep an eye out forrare FATEs like The Serpentlord Seethesto gain rewards like mounts .
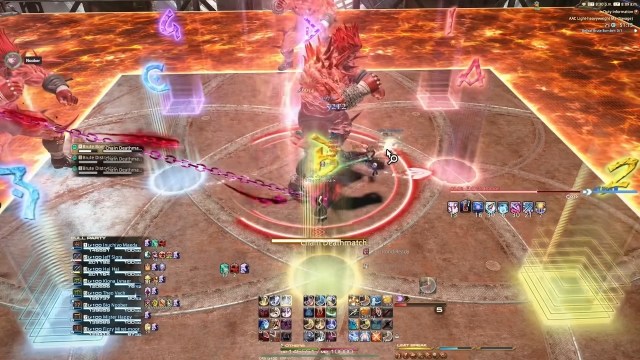
Image: woops
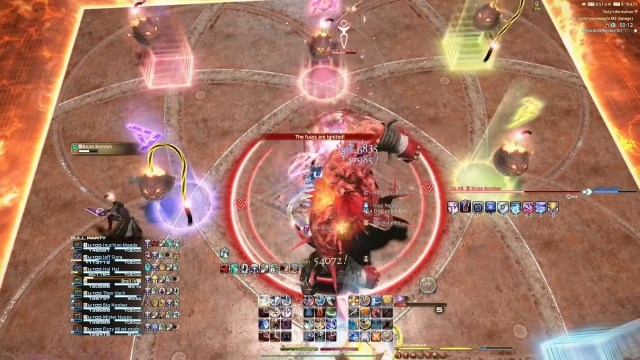
Image: woops
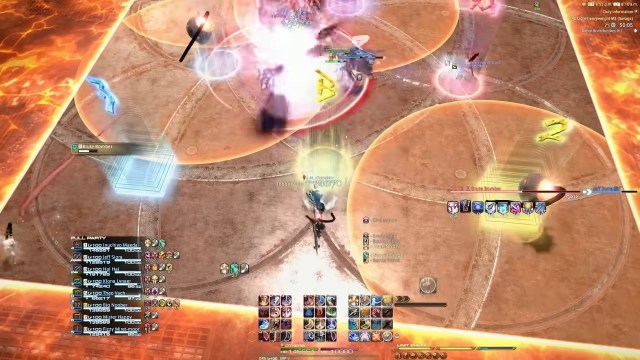
Image: woops
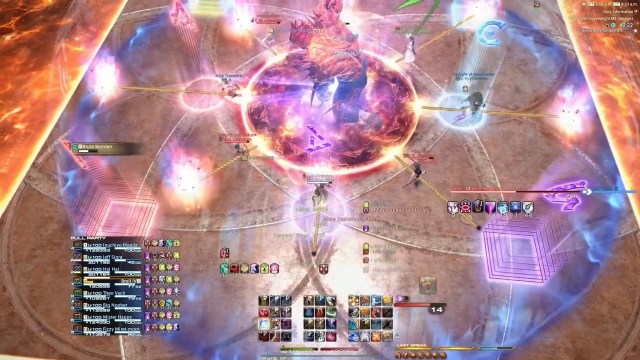
Image: woops

Image: woops
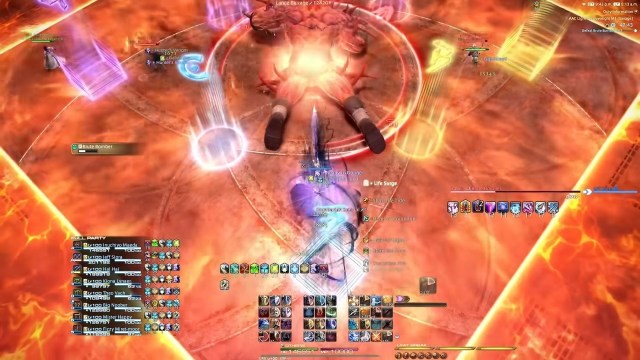
Image: woops
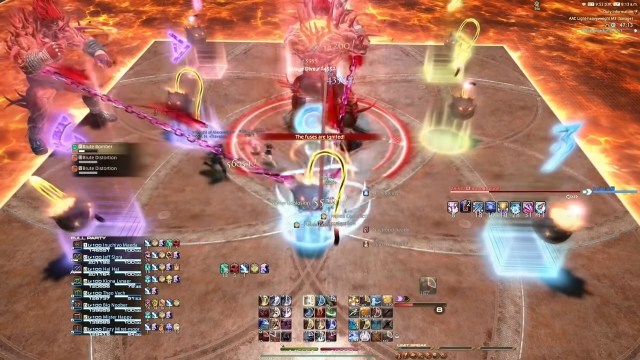
Image: woops

Image: woops
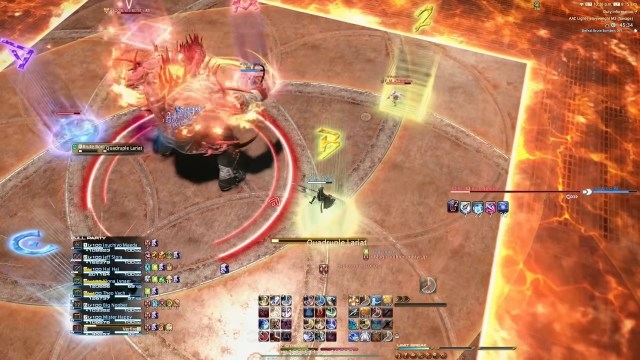
Image: woops
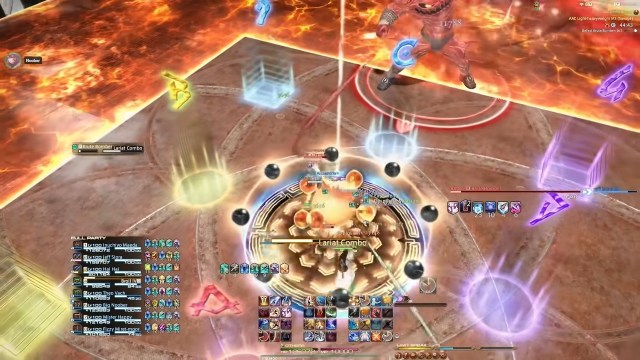
Image: woops
