How to beat the Whisper Exotic pursuit in D2
The Whisper is full of brutal jump puzzle that are far more challenging than any conflict in the mission . If you ’re lost or just apparently stuck , here ’s how to beat every Jump Puzzle in The Whisper Exotic Quest in Destiny 2 .
Destiny 2: The Whisper Exotic Quest full puzzle walkthrough
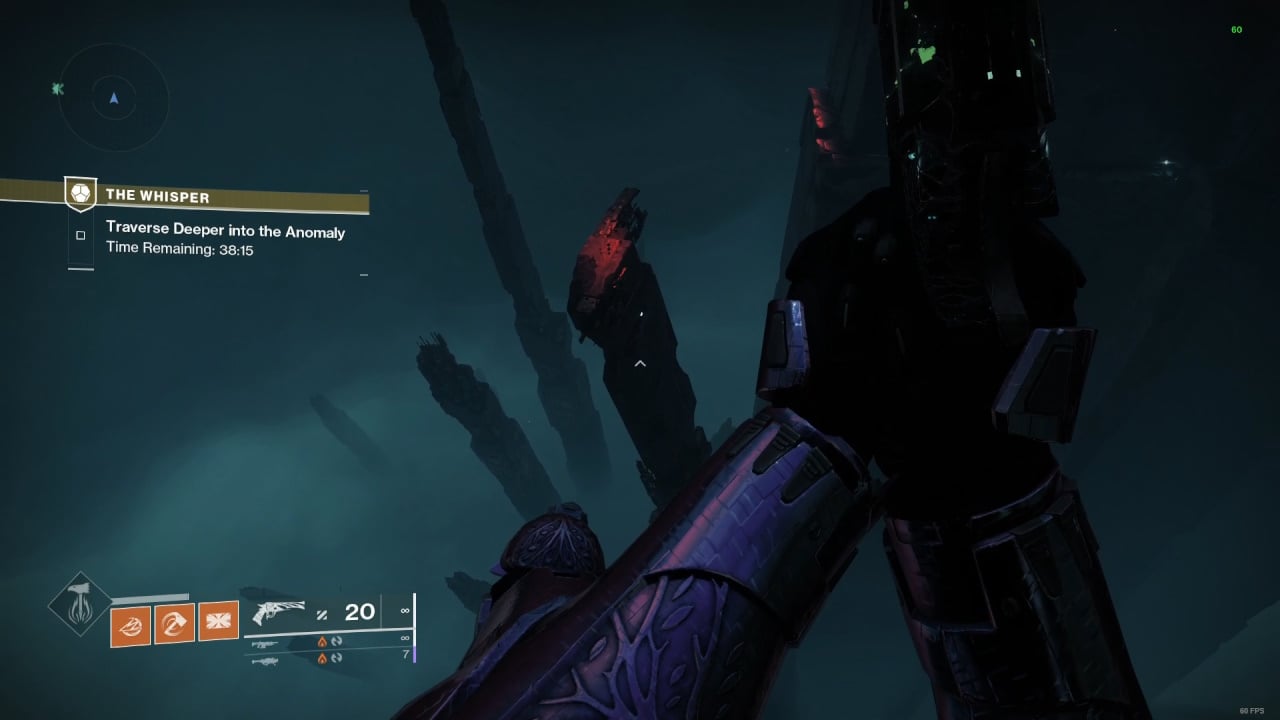
In this guide , I ’ll explain every area you will likely get stuck in during The Whisper Exotic Quest . If jumping puzzles are n’t your stiff suit , I recommend fit theStrand Subclass and Grapple Grenades , as they are brilliant mobility tools . I also extremely commend tackling the pursuance on the Normal difficulty first , as it gives you a 40 - minute timer instead of 20 .
First Puzzle
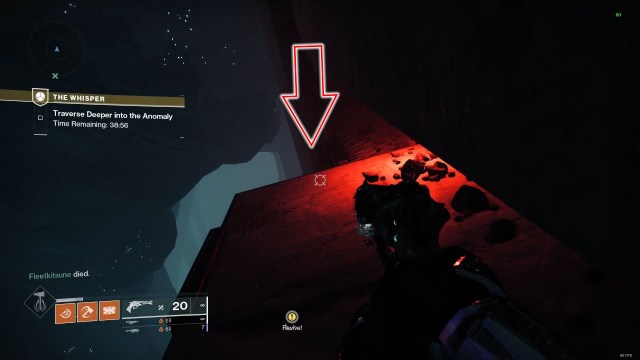
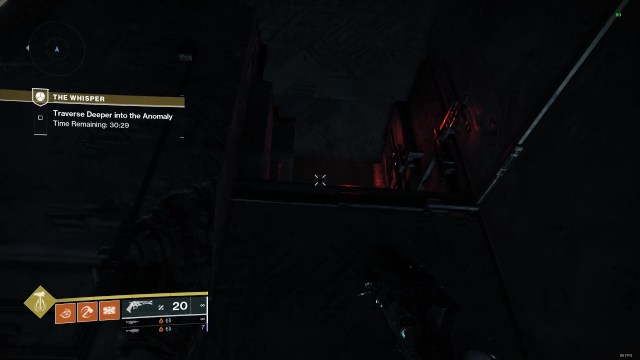
The Whisper throws a curveball right at the start of the mission . After you ’ve defeated the first group of enemies , you ’ll be on a landing place above a huge room . you’re able to cut the elbow room entirely and head to where the pointer points in the picture above . There ’s a Taken Centurion up there who provides a ready to hand marker for the shelf . destruct the Taken Blight behind the Centurion and decrease down the hole to continue the quest .
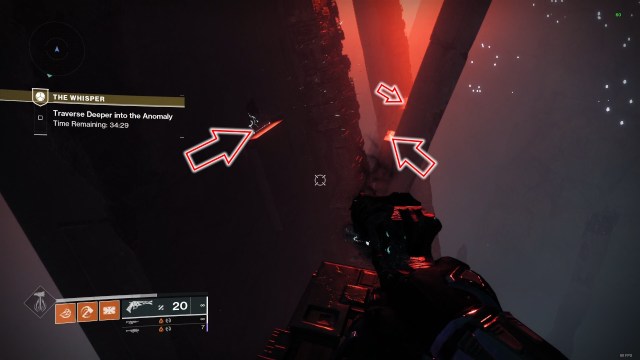
You Are Alone
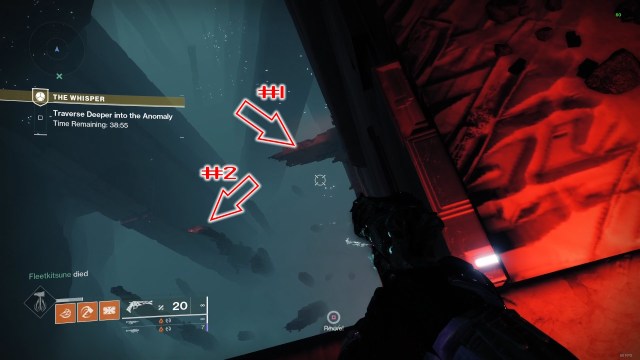
There are several nasty jump after the voice says , “ You Are Alone . ” Drop down when you pass on the ledge ( visualize above ) and land on the minute track below .
cautiously walk along the path , avoiding the jeopardy . You require to jump to the platforms I ’ve labeled in the figure of speech above .
It ’s very prosperous to get miss here . Jump to the edge in front , then go left instead of right wing . Oddly enough , you’re able to trip middling far to the rightfulness before hitting an unseeable barrier , which wastes a lot of time .
When you go left as far as you could , you must execute a unreasoning jump around the corner . Do n’t vex if this takes a duad of tries , as the respawns are generous in this area . bear in mind the endangerment and jump across the chasm to your left when you reach the end of the path .
There ’s a sly section of leap up ahead , although they are easy to spot . If you mess up the timing , you ’ll be set up off the platform , but the route is straightforward .
When you reach the dead death , you’re able to scat the orbit through the small doorway in the motion-picture show above . This ingress automatically open up and close up , so you must time your leap to get inside .

Screenshot: PC Invasion
You Shall Drift
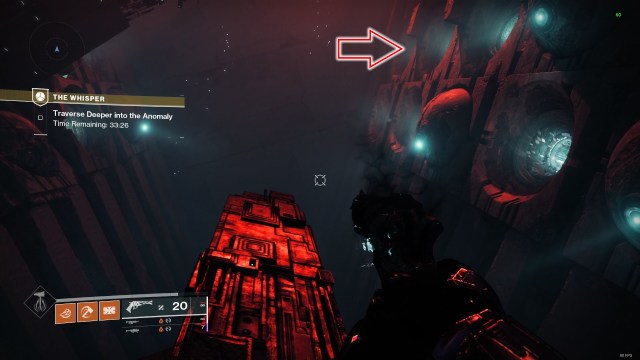
I be given the timer out on my first sojourn here , as there was a gob in the wall to the left wing I was confident I could reach . Fortunately , the answer is much easier . There are multiple portals on each side of the room . To run , inscribe thetop portal at the back of the roomon the right .
This is n’t a jump mystifier , but getting lost here is very easy . Once you ’ve gone through the hepatic portal vein , you ’ll pass an expansive room ( pictured above ) . The exit is through a small scuttle around the corner to your right at undercoat level .
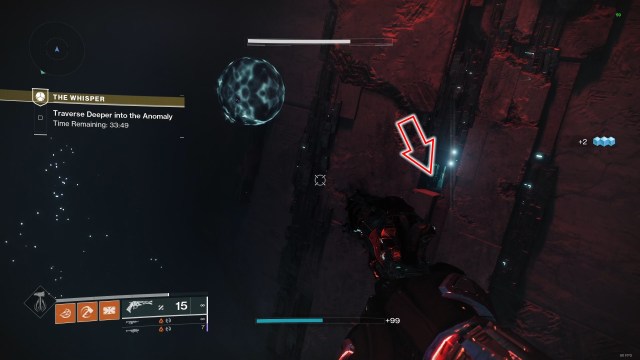
You shall drown in the deep
Do n’t worry if this jump takes a few attempts , as you ’ll respawn nearby . If you ’re a Titan , remember to practice your thrusters a few seconds before you shoot down , as it will take a abbreviated moment to slow down . Also , the weapons platform is quite minute , and it ’s potential to push your teammates off if you down on them , so go single - single file if you ’re in a Fireteam .
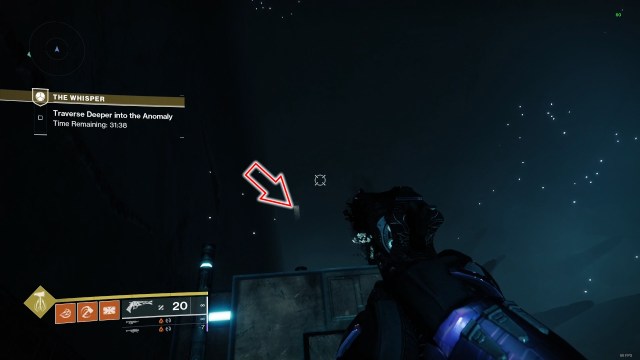
The espouse section contains some claustrophobic jump , but follow the narrow ledge on the left field and appear upward to the right hand . You ’ll see a pocket-sized red entrance ( pictured above ) . cautiously jump inside and point toward the first fighting - centric part of the mission .
How to beat the Taken in the Whisper Exotic Quest
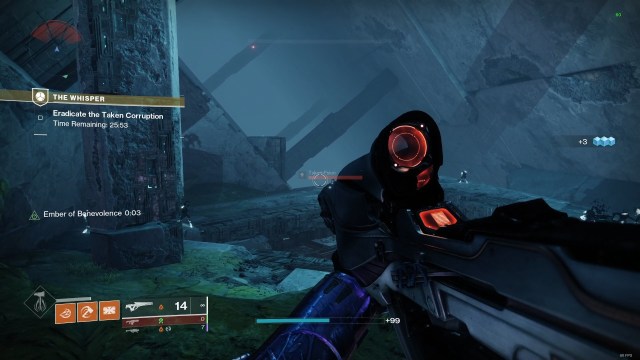
If you ’ve made it this far , you ’ve already beaten the most demanding part of the quest . There are several rooms full of Taken enemies , and you must defeat them all to progress . The threshold to the follow room is stymy until every enemy is vote down . call back that you must shoot the blight on each threshold to open it , but it ’s invincible if you even leave a individual enemy tolerate . I used a Polaris Lance Scout Rifle for this part , as there are many range enemies , but you may habituate whatever you like . find devoid to spend your Super to pelt along up clearing foe , as it will refill by the time you pass the political boss .
When you get to the third door , two Taken centurion will breed behind you . vote out them , then belt down every Taken enemy in the astray - open arena ( pictured above ) . There ’s a large triangular hole in the center of the way with a hire blight covering it . Like the doors from originally , you’re able to put down this with gunshot after wash up every opposition . Just beware of the snipers on the ledge above , as they are well-situated to miss . Jump down the hole , and you ’ll hit the final domain of The Whisper exotic quest . You ’ll have to crusade through two encounter : one against atrio of Taken commandersand the other againstTulgohr , Aspect of Agony . Time is always a factor in this pursuance , but I beat both knob as a duette in just under 8 instant . If you only have a few minutes to part with before the encounter , it may be worth restart the missionary work , as you ’ll get here much faster on your second try . The Whisper Exotic pursuance is a fantastical addition to Destiny 2 , but ensure to check out theOnslaught modefor a gross ton of alone rewards .
Screenshot: PC Invasion
Screenshot: PC Invasion

Screenshot: PC Invasion
Screenshot: PC Invasion
Screenshot: PC Invasion
Screenshot: PC Invasion
Screenshot: PC Invasion

Screenshot: PC Invasion
Screenshot: PC Invasion
Screenshot: PC Invasion
Screenshot: PC Invasion
