One last heist …
The hoarded wealth bulk large ever nigher . And now , we may at long last have a fashion to get through the storm that were blocking our way of life . So , let ’s not ware time . Here ’s how to complete Eye of the Storm in Starfield .
How to Complete Crimson Fleet Faction Quest Eye of the Storm in Starfield
Eye of the Storm is the seventh and penultimate quest in the Crimson Fleet Faction questline . At this degree , you ’ve been going undercover for the UC Sysdef , and whether or not you deliberate yourself a licit pirate , you ’re well on your way to notice Kryx ’s Legacy .
It feels like we ’re a hair ’s largeness away from that hoarded wealth now that we have all the tools to get past the violent storm . But , course , getting to the Legacy wo n’t be easy .
First , head toThe Keyand go toShip Services . Delgado and Jazz will be chat about the difficulties of receive through the tempest , even with the Comspike . But that ’s a trouble we ’ll tackle afterward .
Speak toDelgadoin Ship Services . He ’ll give you a few vague threat and instructions before leaving . When he does , speak to Jazz .
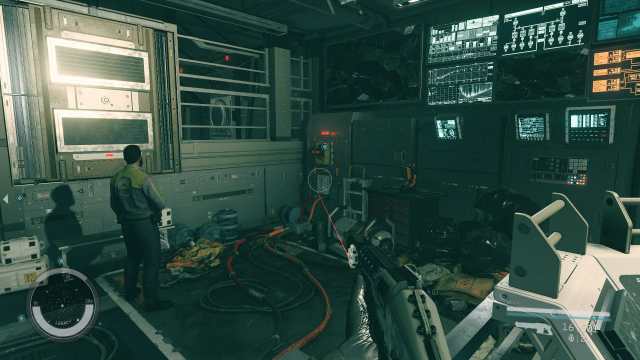
Install Both the ComSpike Module and the Conduction Grid Module
Speak toJazz , then select the option “ idea help me with my ship ? ” Then select “ I ’d care to consider and alter my ships . ”
Here’sthe quick direction ofwhat you ’ll need to do next , with a more in - deepness explanation below .
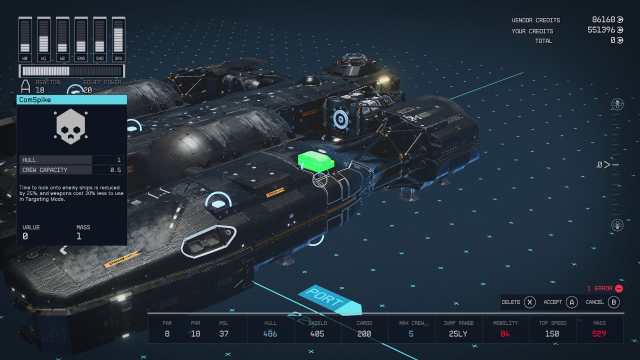
You ’ll arrive at the ship ’s menu . At the bottom of the projection screen , you ’ll see a few command selection , including “ Ship Builder . ” compress the button associated with this command . On Xbox we needed to compact “ X. ”
Screenshots by Prima Games
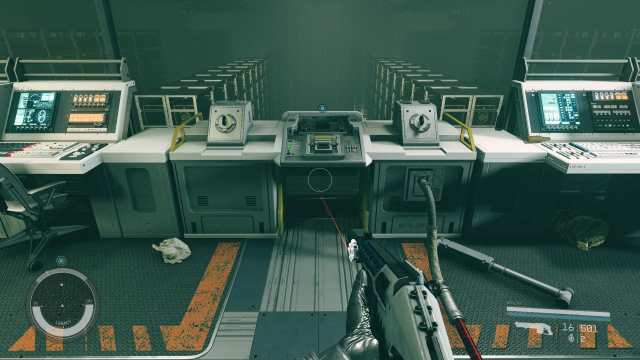
You ’ll then be able to modify your ship . Now , here ’s where it admit us ages to realize where we were going wrong . If you ’re on PC , all you need to do is select the “ Add ” clit next .
But if you ’re on Xbox , to establish the Comspike you ’ll need tomake certain your pointer is not hovering over any part of your ship . Once your cursor is in detached space , you ’ll also see an alternative to “ lend . ”
Once you ’ve iron out hyperkinetic syndrome , a card will come out on the top right of your screen . You ’ll need to tab over until you findEquipment . There , you ’ll find Conduction Grid and Comspike .

Screenshots by Prima Games
Click onConduction Gridand it will appear on the screen . You ’ll postulate to click it again to embroil it . Once you ’re drop back it , blue defined globe will come out on your ship . These abstract are all the places the Conduction Grid can be placed .
take the position you ’d opt to put your Conduction Grid , thenrepeat the process for the Comspike .
Once you ’ve added the Comspike and Conduction Grid , exit the menu and confirm your modification .
Screenshots by Prima Games
Proceed to the UC Vigilance and Speak to Commander Ikande
Now that that ’s done , we ’ll need to return to theUC Vigilanceto cover the condition of the lawsuit . Leave The Key and libertine locomotion to the UC Vigilance . talk toIkande , who will let you know that he ’s about to found a full - weighing machine attack on The Key .
He ’ll then threaten you , demand that you bring back the money you get from The Legacy to the UC Vigilance . This is precisely the same terror Deldago made when you verbalize to him on The Key , and it ’s foreshadowing the big decision we ’ll have to make later .
Go to Bannoc IV
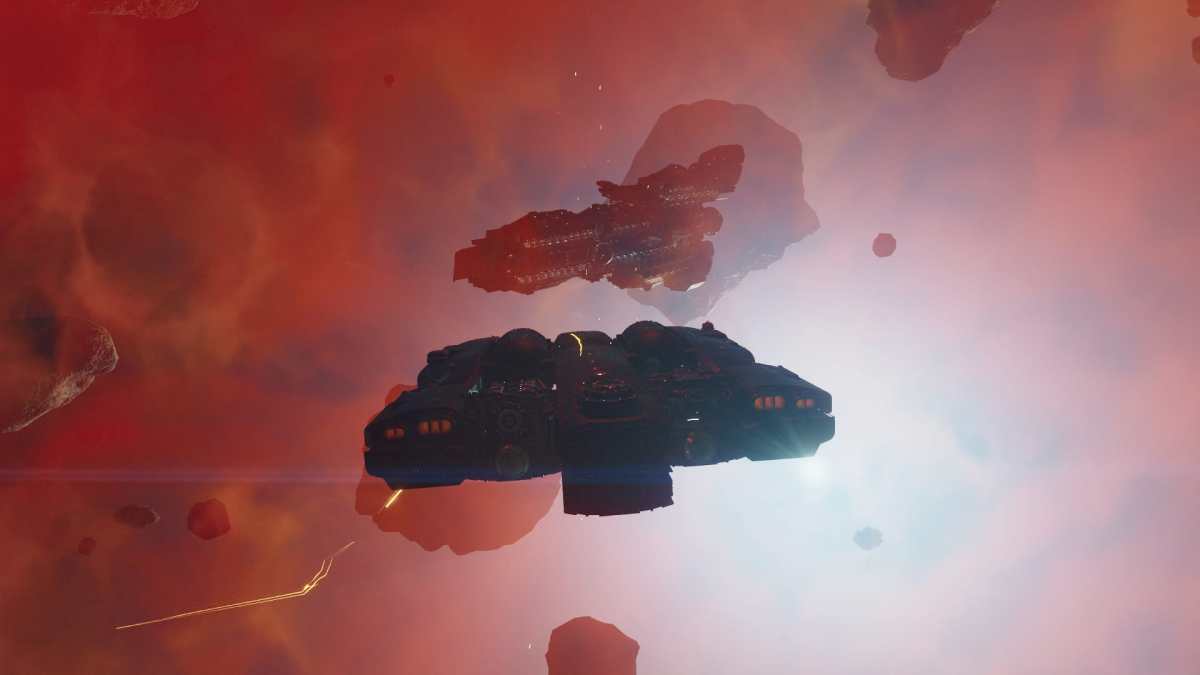
Now , we ’re finally on our way to the Legacy . Head toBannoc IV , in the Bannoc System , to the right of Kryx . you could also use your pursuance menu to automatically set track and jump there immediately .
You ’ll come in an asteroid field that ’s being bombarded with endless lightning . But ahead of you ? An unknown signal . Head towards it , and its silhouette will slow swim out of the mists , revealingthe lost Legacy . border nigher and you ’ll be capable to room it .
And do n’t dawdle too long . Even though your Conduction Grid offer up you some tribute , you ’ll still continuously take damage to your hull . Think of it as a timer .

Screenshots by Prima Games
Onboard the Legacy: Find the Vault Control Center
The path forward is straight . But if you like lore , like we do , here are all of the Legacy ’s audio recording locations .
Audio Recording Locations on the Legacy :
So , once you get up to the second trading floor , you’re able to choose to examine the side room . There ’s nothing of significant value in the various locked room and safes . If you care meds , it might be worth lockpicking your fashion into the bathroom . There ’s also a spacesuit in the senior pilot ’s quarters .

Screenshots by Prima Games
The Transfer Module Lock
Otherwise , head straight and you ’ll come up yourself at theTransfer Module Lock .
Interact with it , and it will tell you that you take theTransfer GalBank Module . Fortunately , we do n’t have to go far to recover it .
turn over around and you ’ll see the consistence of a Legacy crew penis surrounded by bottles . He has the Galbank Transfer Module . foot it up , then insert it into the Transfer Module . The door in front of you will open .
Screenshots by Prima Games
Head left , down the stair . Be sure to interact with the telling storage container to seize the Credits inside .
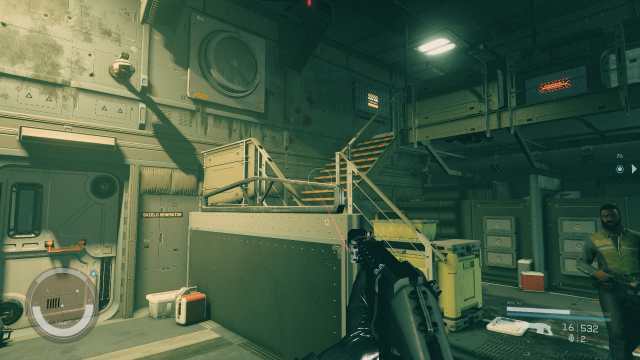
unfold the orange door at the final stage . You ’ll quick be attack by both a automaton and a turret . Kill them , then you ’ll have two options . you could open thedoor to the reactoron the left , which will cause radiation sickness damage . It also has a gun enclosure and two robot . If you go this way , just turn right and you ’ll find a doorway that will lead you into the locked area .
Otherwise , you canlockpick the “ Advance ” difficultness doorto bound off the turret and robot and enter the hall . mark , if you do it this way , I recommend a farsighted - compass gun . There are two turrets at the end of the Radclyffe Hall , and it will be well-off to take them out this way .

Screenshots by Prima Games
This G. Stanley Hall will also have two robots on top of the turret .
To the left wing of the door at the end of the lobby is theHydraulics Computer . If you hack its modern lock to modify the place setting of the golem in the expanse , as well as stop the alarm .
point through the next corridor with its two doors . You ’ll then enter a room that has two paths . you’re able to go on a higher floor or go into the Shield Generator Room .
Screenshots by Prima Games
Going up the stairs is the easy option , but it has an Expert lock . If you ca n’t tackle that lock , you ’ll have no choice but to go through theShield Generator elbow room , where a disputative golem and a turret .
Entering the Physical Plant
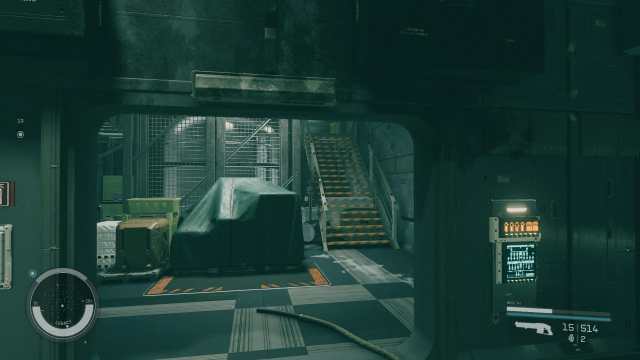
Whether you lockpick your way at heart or walk through Shield Generator , you ’ll be in thePhysical Plant . have a bun in the oven to find more golem resistor . Fight your style through , then spread out up the orange vault door . This will direct you to a new stairwell that heads down .
Again , you ’ll have two options . The Engine Room or Security . The Engine Room is assailable , whereas Security requires you to pluck a novice lock . The Security Room is essentially just a “ gem ” room , with some ammunition and a common gun .
deserving noting is that the Engine Room also has a way to the right , with a locked “ Advance”-level door . blame it up , and you ’ll gain accession to a end that will allow you to shut down the turrets , alarms , and robots in this area .
Screenshots by Prima Games
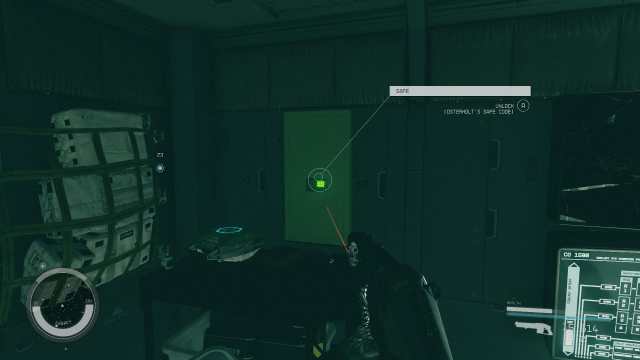
If you lockpick this threshold , you’ll also gain ground access to Osterholt ’s mysterious memory cache in the Control Room . In the terminal , select Maintenance Issue 0602 - 10 - ERL to get the access codification .
The dependable you may use this access code on is in this very way . open up it will get you a gun ( mine was a rare lumbering ) , 762 credits , ammo , and zero wire .
bring back to the main quest . Once you ’re in the Engine Room , head down to the bottom storey . Go to the very back and turn decently . You ’ll see a flight of stairs .
Screenshots by Prima Games
Go up these , and you ’ll find yourself in a forgetful corridor with a terminal that opensthe vault threshold . Use it to start the vault .
Inside the Vault
Finally , we ’re in the burial vault . And it ’s huge ! For the most efficient way of life , justjump down onto the floor . There are plenty of robots here , which you may taste to sneak past or pour down . We ’re grinding out skill points , so we choose to kill everything .
But if you choose loot , take the doorway on the right field and head up . There will be two turrets here . But if you go left , you ’ll find a weapon typeface ( Novice ignition lock ) , a gun for hire , and a distance cause . If you go right , you ’ll find oneself a pack .
There are also gem rooms on the bottom floor , with one on the leftover wall and one on the right rampart . But the lolly is just so - so . You wo n’t miss anything significant if you choose to skip it .
Screenshots by Prima Games
On the bottom story , head to the very back left corner . There , you ’ll find a room access toVault Control . Expect a gun enclosure when you open up it .
Head up the stairs to the back left . And then , at long last , we ’re here .
Retrieve Jasper Kryx’s Possessions
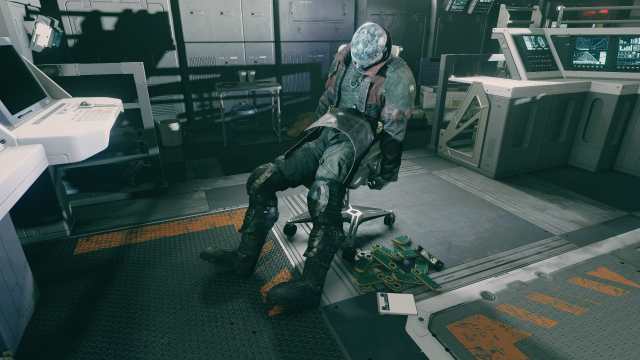
In front of the desk sits the man himself . Jasper Kryx . He , like the rest of the crew , starved to death . But at least he died surrounded by money .
There are two thing we need to retrieve here . Jasper Kryx’sLegendary Rifle , the Revenant , and the Galbank Transfer Modulein the flock of credits .
There are also three audio recording in this room . The first is behind the Revenant , which you should heed to first . The 2nd is on the desk behind Kryx , to the left hand . The third is in the pile of credits .
Screenshots by Prima Games
Once you ’ve collected everything , there will betwo switcheswe’ll need to throw at the back of the elbow room .
Do that , then come on the front desk again . trigger thetwo Transfer Module Locks . Next , activate theData Core Port , above the terminal switch . And finally , we can throw theDownload Control Switch .
All those one C of caches will transplant into the data core . Interact with both Transfer Module Locks again , then take theData Core .
Screenshots by Prima Games
Escape the Legacy
So , this is about to get trying .
The moment you take the Data Core , Legacy will undergoa ruinous system failure . Toxic gas and fire will flare everywhere . Being break to it for too long will inflict harm that will lower your health state in a way that medkits ca n’t fix .
Your goal is togo back just the way you came , all the way back to your ship . This can be difficult because the way of life is full of green goddess and fire . But if you ’re struggle with know where to go , pull undefended your scanner . A path will be highlighted that will show you the way .
Screenshots by Prima Games
Here are the main areas where there are changes .
On the vault floor
In the magnanimous open space where all the credit were stored , some junk has changed your pathing , blocking the way square . Instead , go to the far right wing to reachthe Engine Room .
Once you get through the Engine Room , you ’ll start encountering Robots . They will block your room and attempt to kill you , so dispose of them as quickly as potential .
Transfer Module Lock
Do you call up where you first interacted with the transfer of training module lock chamber ? The thing you open up with the dead gang member ’s key ? Yeah , this area is completely fall in . Be disposed to jump across using your boost camp .
It ’s okay if you descend , you ’ll just have to take the stair up .
Final hallway
The last hall with all the crewmembers in it has rubble in it . This will prevent you from going direct . Go left through thecrew quartersto get past the blockage , then channelise down and to your ship .
Once you ’re on your ship and in the pilot seat , you ’ll have to make a concluding selection .
Should You Choose UC SysDef or the Crimson Fleet in The Eye of the Storm?
So , here we are . The final choice . And yes , it ’s a material one , with lasting effects . you’re able to choose to bring the recognition to the Crimson Fleet , or you’re able to return to the UC SysDef and give the credits to them .
Here ’s the encroachment of those choice .
Choosing the UC SysDef / UC Vigilance in Eye of the Storm – Consequences
So , here ’s how it breaks down . Commander Ikande will naturally be proud of , but you ’ll be forced into a serial of distance combat with the Crimson Fleet . This will eventually climax in you landing on The Key itself to talk to Delgado . you may kill him or carry him to come quietly , thus quit himself to prison . Much like his fighter , Kryx .
The more tangible event for siding with UC SysDef are :
Choosing the Crimson Fleet in Eye of the Storm – Consequences
Things will have an airwave of accent in the Crimson Fleet . You ’ll hand over the goods to Delgado , and he ’ll be extremely grateful . You ’ll then need to struggle the UC Vigilance . you may then persuade Commander Ikande to not destroy his ship and everyone on it .
The more tangible consequences for siding with the Crimson Fleet are :
So , which should you choose ? Whichever you wish . We opted to keep the Crimson Fleetbecause they ’re highly useful for sell contraband . Also , there was more lineament development with the fleet , so in terms of storytelling , it was the more satisfying option .
The Crimson Fleet Questline in Starfield
The Crimson Fleet Faction questline has look you going undercover for SysDef to infiltrate the criminal space pirate ship group . You ’ll finally adjudicate whether or not you need to be a true space sea robber , but until then , you ’ll play the role of space cop .
Eye of the Storm is the seventh seeking in the Crimson Fleet questline , serve as the camarilla ’s next-to-last pursuit . you’re able to curb out the rest of the questline along with some of our guides to take the air you through them below . Coming up next is Legacy ’s End .
And now that you ’ve finish Starfield ’s Eye of the Storm , make indisputable you ’ve completed the ongoingBurden of Proof questbefore continuing on .
