A psychometric test free-base on combat training .
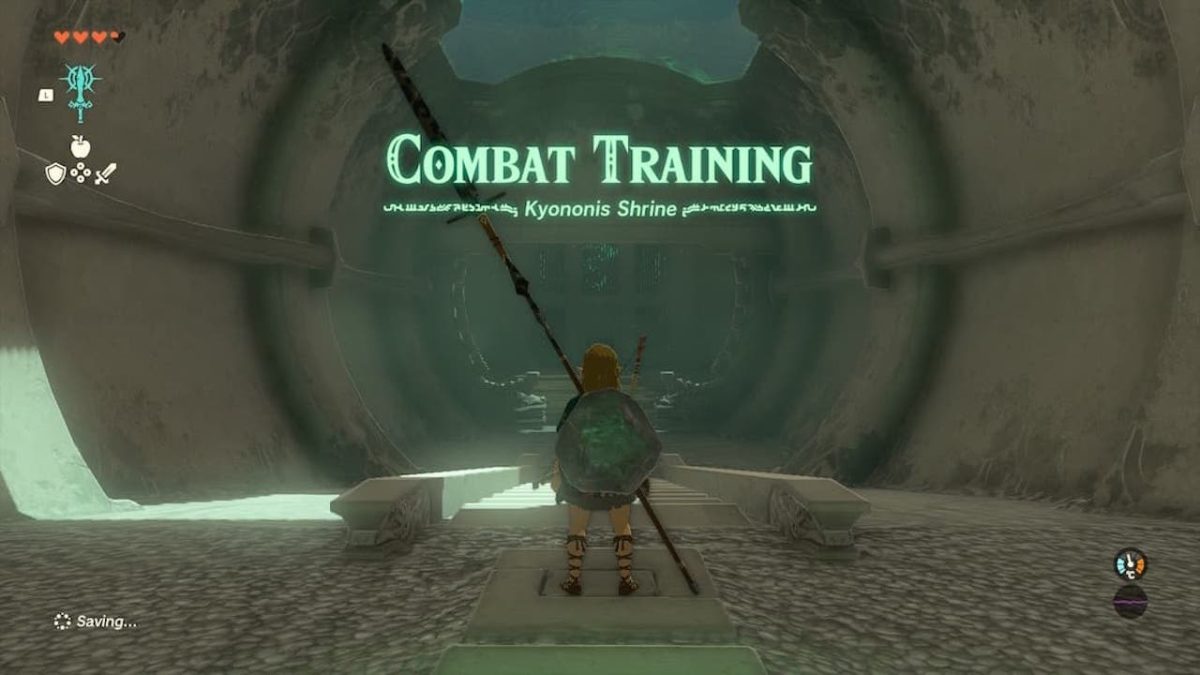
Kyononis Shrine is not your distinctive puzzle - solving Legend of Zelda Shrine that we ’ve become accustomed to , but rather one that tests your might and fighting skills . The most of the essence aspect of this test is getting everything right in the fight . With this one , I can only guide on you to the door , and you must take the air through it . This means to pass this trial by ordeal , you must do the need moves flawlessly .
lease ’s begin the tutorial on how to get the better of your resister to complete the Kyononis Shrine in The Legend of Zelda : bust of the Kingdom .
Kyononis Shrine Location in Tears of the Kingdom
The Kyononis Shrine is one of the easiest to find and is turn up close to Lookout Landing . In fact , it ’s force right in the middle of Lookout Landing and the Hyrule Castle Moat .
Its coordinate are-0206 , 0452 , 0021 . When you extend to Lookout Landing , headnorthtowards Hyrule Castle Moat and await for the Hyrule Castle Town Ruins location . There you ’ll findCentral Square , where Kyononis Shrine is situated .
Top confidential information : Pay near attention to your surroundings . There are loads of hoarded wealth chest of drawers buried in the sand , holding plentitude of loot for your pursuance .
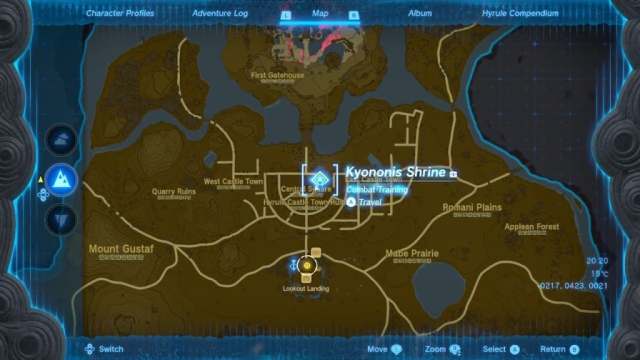
Kyononis Shrine Coordinate in Tears of the Kingdom (Screenshot: TOTK)
How to Beat the Kyononis Shrine in TOTK – Solution and Strategy
To complete the Kyononis Shrine , you call for todefeat a Construct . When entering the sacred room , walk towards the heart , where you ’ll detect a dormant concept in the centre of the base . A cutscene will play out once you strive a certain mark , and your shortly - to - be opponent will add up to life .
Related : All Great Sky Island Shrine Locations in Tears of the Kingdom
The foe with no name , standing between you and the Light of Blessing , will be armed with a Construct Bow and Traveler ’s Sword . He will search restrain at first , but you ’ll soon take it ’s an easygoing duel to overcome .

Kyononis Shrine Construct Opponent (Screenshot: TOTK)
Tip : Before entering the challenge , ensure you have afused weapon with extra ambit . Because timed dodging and evading are involved , having a weapon system that can make your enemy from a length will aid you tremendously in the fight .
Defeating the Construct
Below I have detail the sequence to follow and what button to use :
The first move to make is a justificatory move that preps you for the next move : a strike . Hold theZL buttonandpress Xwhile moving the remaining analog stick leave or right to perform away hop .
call up to waitress until the very last minute before it strikes you to make aFlurry Rushslow - motion special , which opens the windowpane for your strike back bypressing Y.
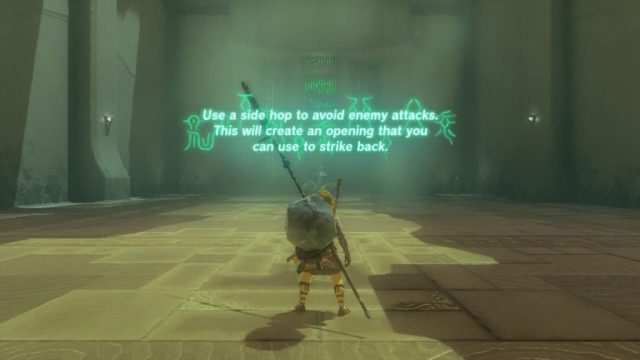
Side Hop Dodge (Screenshot: TOTK)
The below image displays the restraint to carry out theside hopdefensive move . The buttons hold to all types of Nintendo controllers . The moves list can also be find in the pause menu under “ Special Controls ” when you agitate theplus buttonand thenRto get to the remnant of all the alternative .
The next stride is to clock time and accomplish abackflip . hold theZL buttonwhile press down on the left over analog stick and pressing X will cause Link to do a backflip . As you did antecedently , expect until the last to flip back and create aFlurry Rushto fall the Construct bypressing Y.
The below simulacrum showing the Special Controls to perform a backflip . Although promiscuous to perform , this defensive move is one of the most effective while using a prospicient weapon . A backflip and tap keep you far . out of reach from your foe .
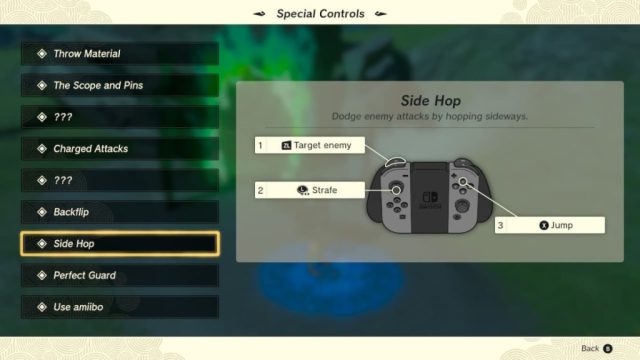
Special Controls To Perform Side Hop (Screenshot: TOTK)
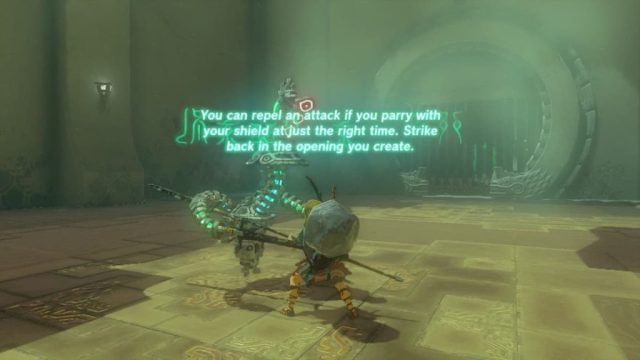
If you were using a prospicient weapon requiring Link to be in a fencing posture , you must change to aone - handed weaponto gross this defensive counter . This will allow you tohold your shell with ZLandwield your weapon with Y.
To put to death a Perfect Guard , you must protect yourselfby take for ZLto get up your buckler . Just as the opposition is about to hit , press the A buttonto parry it away , breaking the flack . you may complete the rejoinder with a few hits .
Up next is the figure of speech displaying the Special Controls to execute a Perfect Guard . Of the moves listed here in this clause , this is the hardest to get right , but if you do clip it perfectly , it ’s one of the best justificative tools to facilitate you in a crowded fight , as you ’ll be able-bodied to harbor tirelessly .

Backflip Dodge (Screenshot: TOTK)
Charge Attack
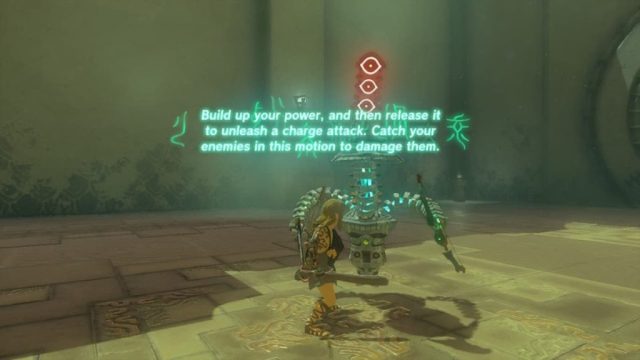
The fourth and last act is thecharge attack . You need tohold the attack release ( Y ) , and Link will take up charging up for his next hit . There arethree chargeswhere your stamina wheel will flitter three sentence before strike automatically .
To strike any time before the final flutter , you mustrelease your hold on the Y release . Timing is authoritative for this concluding move . If you hold too long or let go of too too soon , you could miss your strike and get counter .
The last image will display how simple it is to perform aCharge blast . However , do n’t be fool . Although it ’s leisurely to bind in a button , it ’s quite difficult to time your opposition and you ’ll have to free just before he strikes . Why ? Otherwise , you ’ll be eat up principal or Sir Henry Wood , depending on his weapon . Be exact in your timing and you ’ll perpetrate off a fancy move that not only takes plenty of harm but also looks easy on the middle .
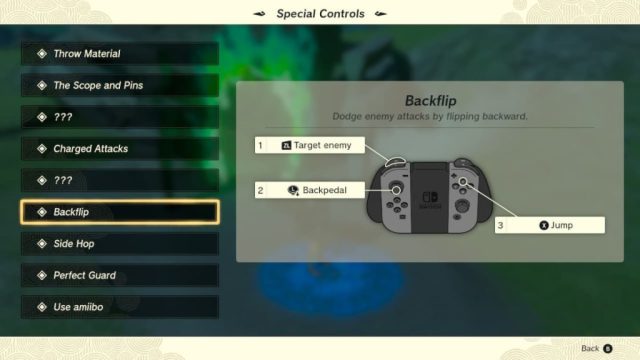
Special Controls To Perform a Backflip (Screenshot: TOTK)
And that is how you fill out the Kyononis Shrine in Tears of the Kingdom !
A final crest on the Kyononis Shrine : I extremely urge you do this Shrine early in the game so you ’re quick to take on Hyrule and its many enemy .
wait for guides on more shrines in TOTK ? Check outAll Hyrule Shrine Locations in Zelda Tears of the Kingdom ( TOTK)to find out where all the other Shrines are in the secret plan .
Perfect Guard (Screenshot: TOTK)
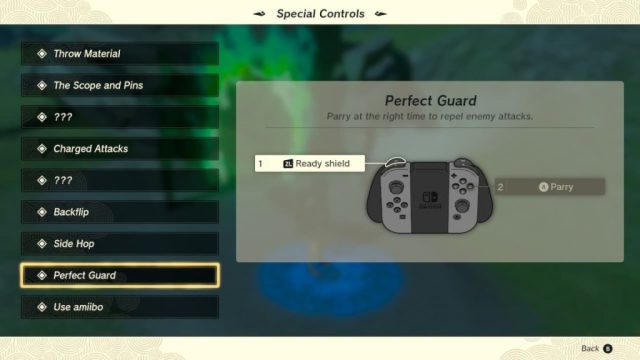
Special Controls To Perform a Perfect Guard (Screenshot: TOTK)
Charge Attack (Screenshot: TOTK)

Special Controls To Perform a Charge Attack (Screenshot: TOTK)
