inviolable power corrupts absolutely .
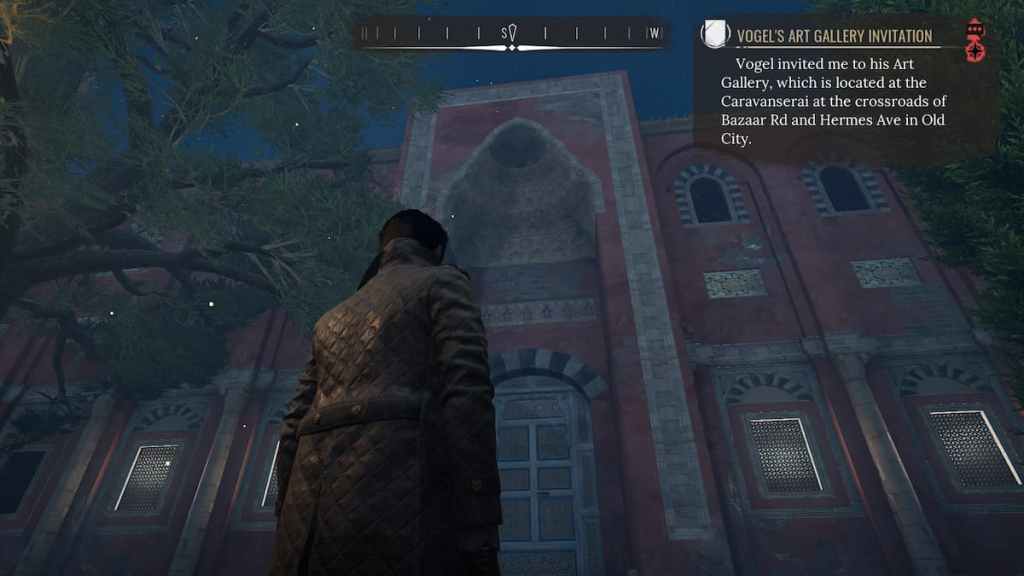
After you ’ve unlocked and in full investigatedViolet ’s roomin Stonewood Manor , you may find a world do as a bluejacket just inside the front door downstairs tobegin this harrowing compositor’s case . verbalise to him , and you ’ll be capable toobserve and profilehimas a courier from Vogel ’s Art Gallery , disguised to test Sherlock . After verbalize to the fake sailor , he ’ll give you an invitation to the gallery — you’ll find it at the intersection ofBazaar Rd and Hermes Ave in Old City .
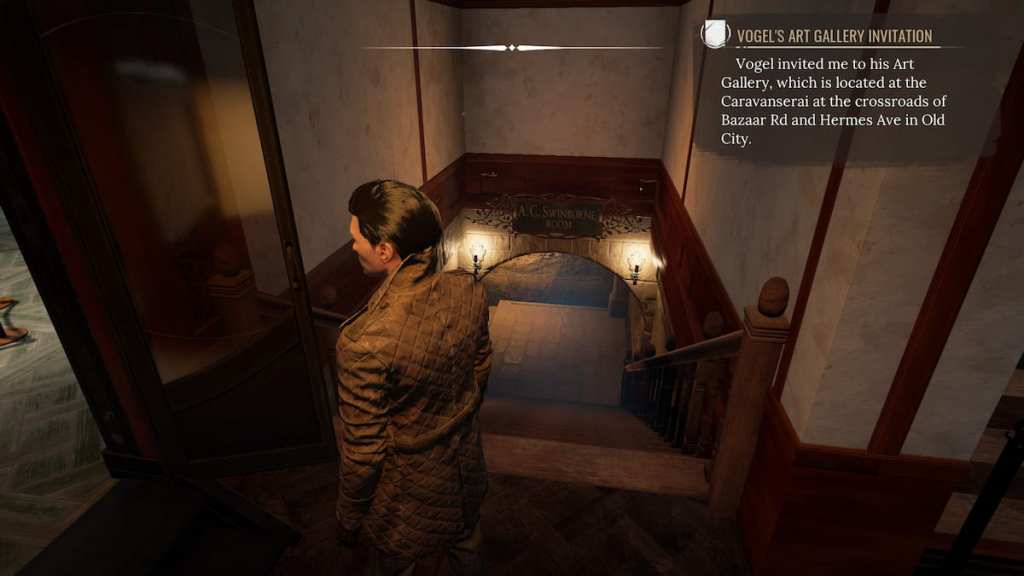
Enter , and you ’ll shortly find Vogel . talk to himto discover out that there was a theft from hisUndergallery , then direct on a lower floor to theA.C. Swinburne Roomto start your investigation .

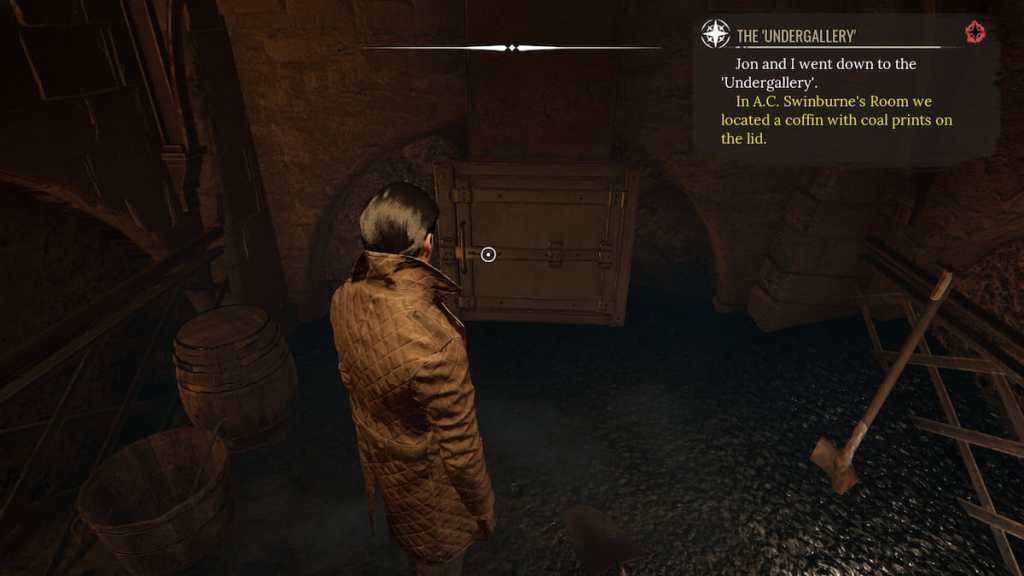
Round the left corner at the bottom of the stairs to enquire ashovel and a curing of dingy footprints . afford the door to the coal parachute to find moredirty footprints and scratchesfrom a magnet .
Exit this way , and you ’ll find acasketsituated on the wall with a skeleton inside . look into it — you’ll see a few interesting thing , but the most crucial clue is thecoal handprinton the interior of the jewel casket chapeau .
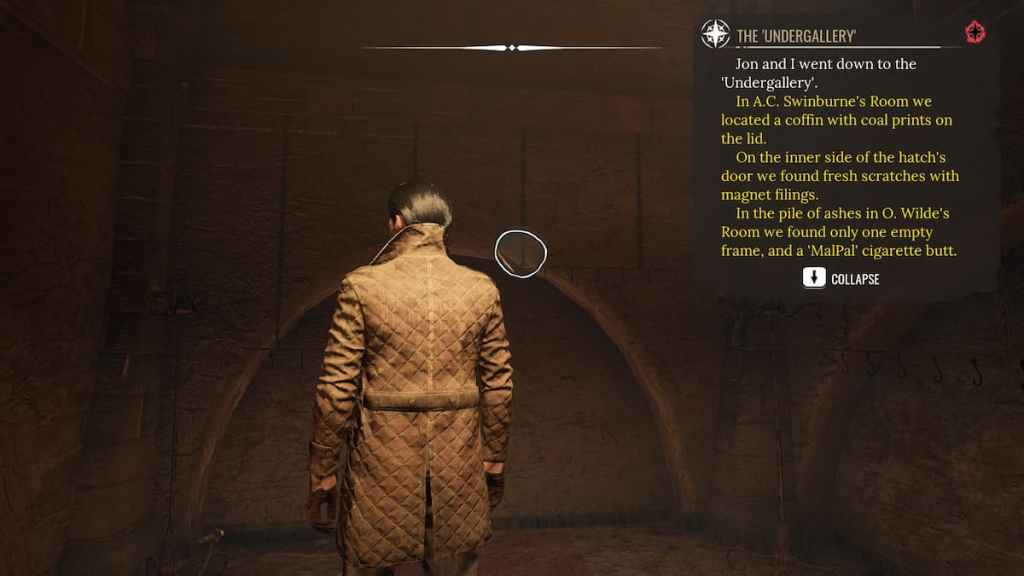
proceed through the Undergallery until you descend to apile of burn art . read it with your Concentration Mode , and you ’ll find remnants of aMalPal cigarettealong with anEmpty Frame . Be sure to rotate the cigarette until you bump thecoal photographic print .
lead to the end of the hall now to find the final pieces of grounds down here . Scan the wall with your Concentration Mode for a glimpse at the wall before the paintings were taken down and glow .
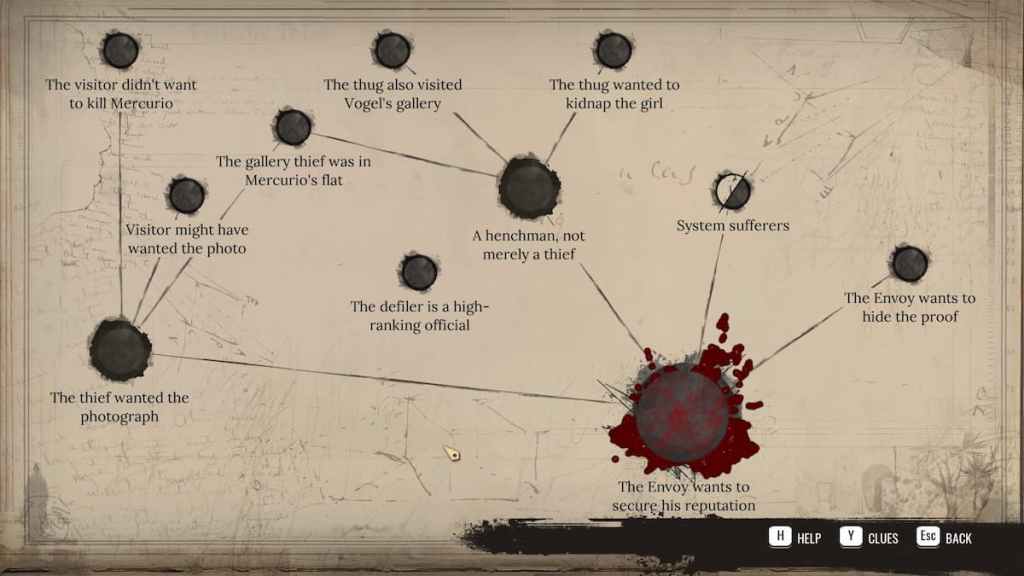
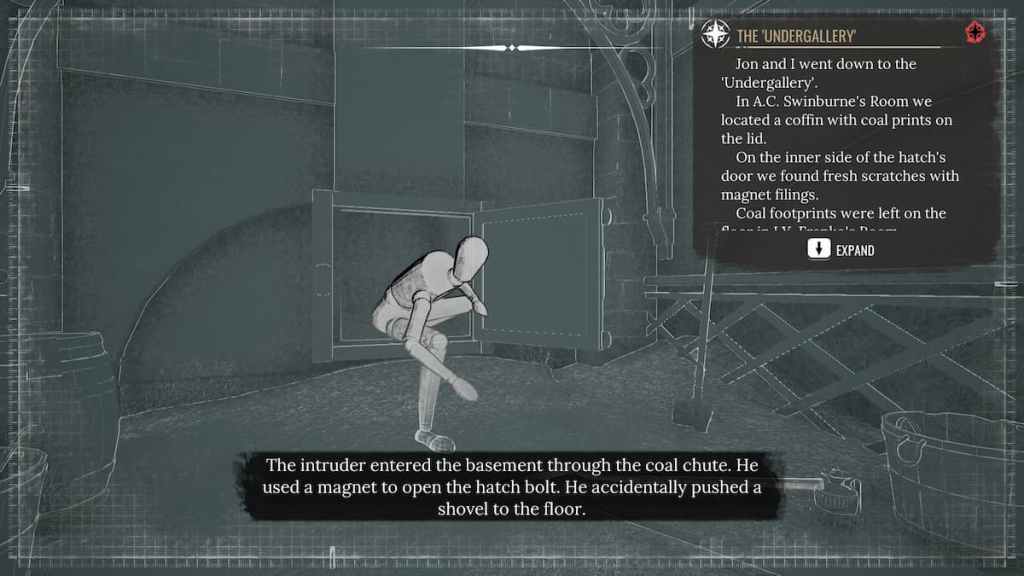
You should have all the grounds you need toreconstruct the sceneof the crime . Head back to the stairs to regain the node andarrange the sceneas follows :
Once successful , render upstairs and share your finding with Vogel . He ’ll ask you a pretentious question about the nontextual matter downstairs — your answerwon’t change anything . play out your dialogue selection as you see fit , and Vogel will give us a name to enquiry — Boniface Mercurio .
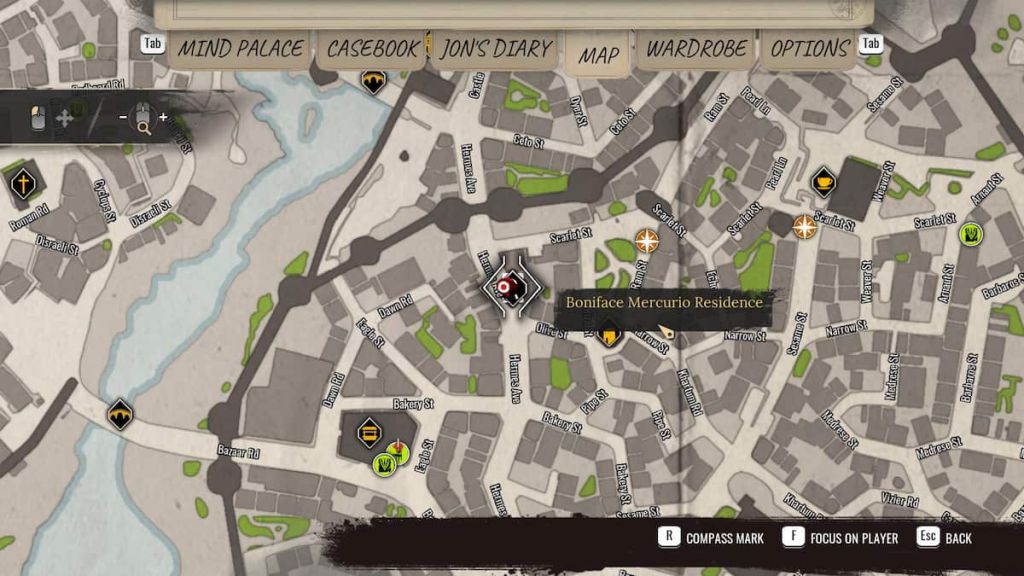
direct to theCordona Chronicle Archives , and be certain to haveMercurio ’s Address evidencepinned to search for the chase :
This will give us a scene of Mercurio and an computer address — an apartment onHermes Ave , Battle of Midway betweenScarlet St and Olive Stin Old City .
If you introduce the apartment right aside , you ’ll quickly find that the landlady is n’t going to cooperate . Leave and channelise south to the nearbyOld City Marketplaceand obtain the vesture bargainer tobuy and equipthe following token :
You should now be infull disguiseas Mercurio . Head back to the apartment , and the landlady will now greet you warmly and permit you through to Mercurio ’s apartment — enter , and you ’ll find thedead bodyof Boniface Mercurio .
relate : How to Solve A Gilded Gage Case in Sherlock Holmes Chapter One
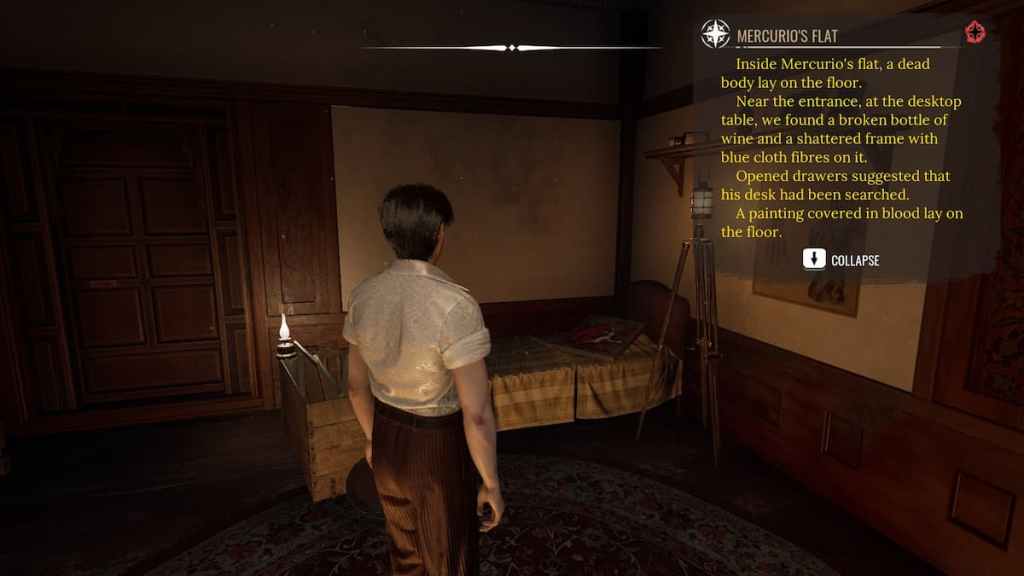
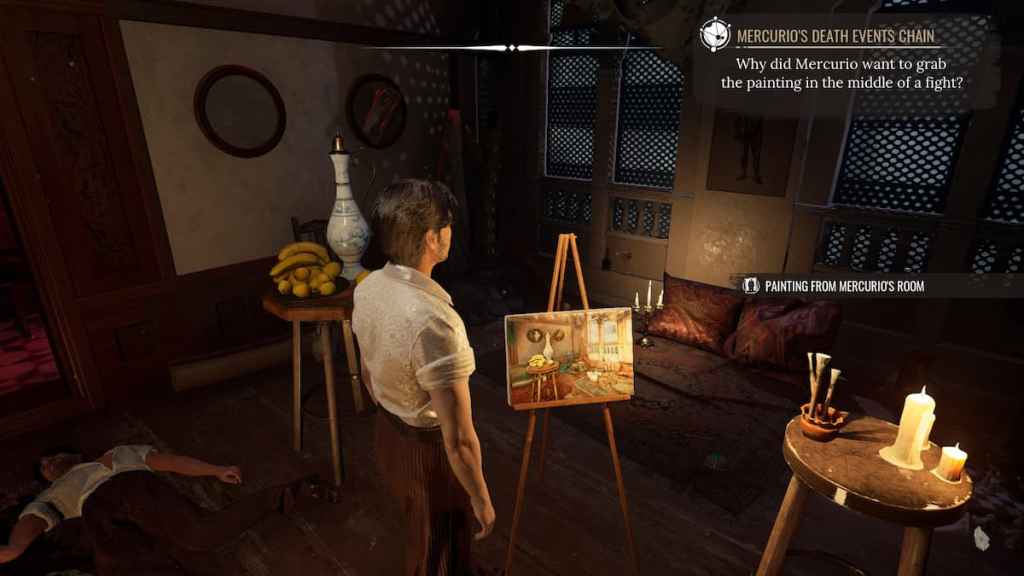
go by investigating the torso , and you ’ll find clues from scanning hisneck lesion , thorax , hand , bally tag , and the fucking kniferight next to him . At his feet , you ’ll find out ablood - stained painting .

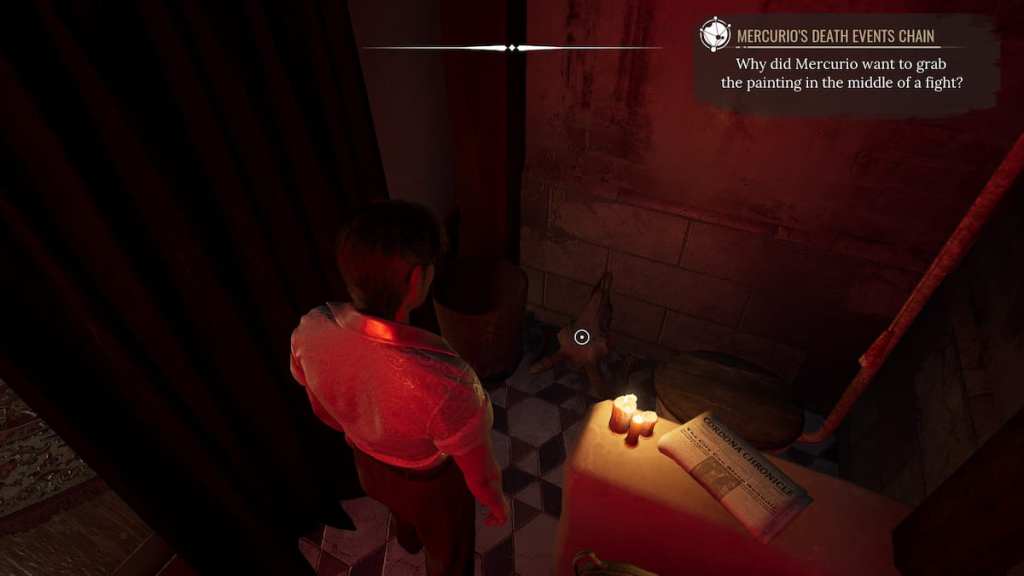
Find the desk nearby and investigate it . You ’ll find oneself Mercurio’sFancy Camera , a shattered mirror andwine bottleful , a missing tongue , and some intelligence clippings in an open drawer . Move on to thebed area — canvass the assembling ofwine bottlesby the door , thechest of painting , and the morbidpainting on the bed .
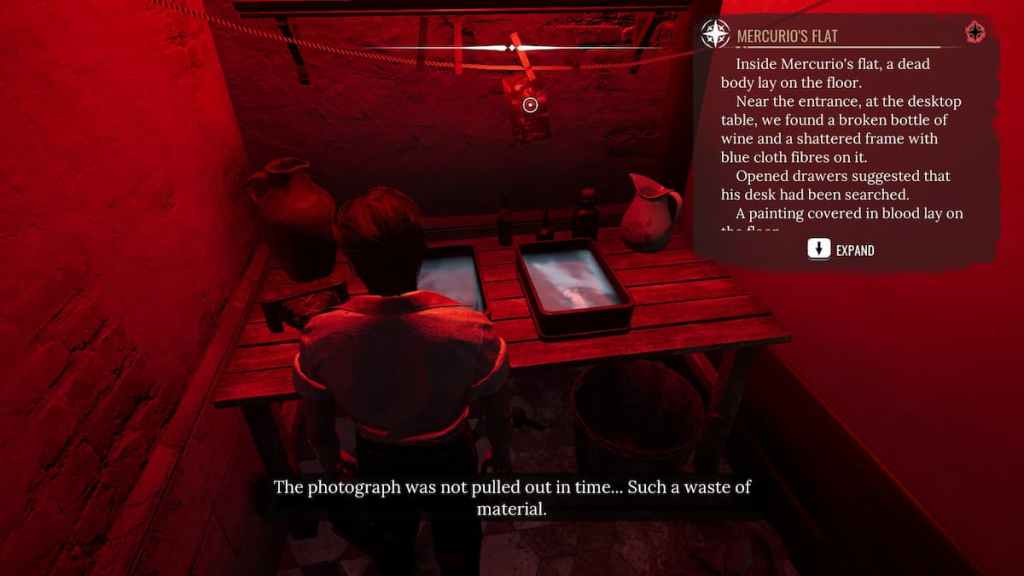
From here , head up into Mercurio ’s darkroom , where you ’ll find acouple of photosthat connexion to the picture on the bed .
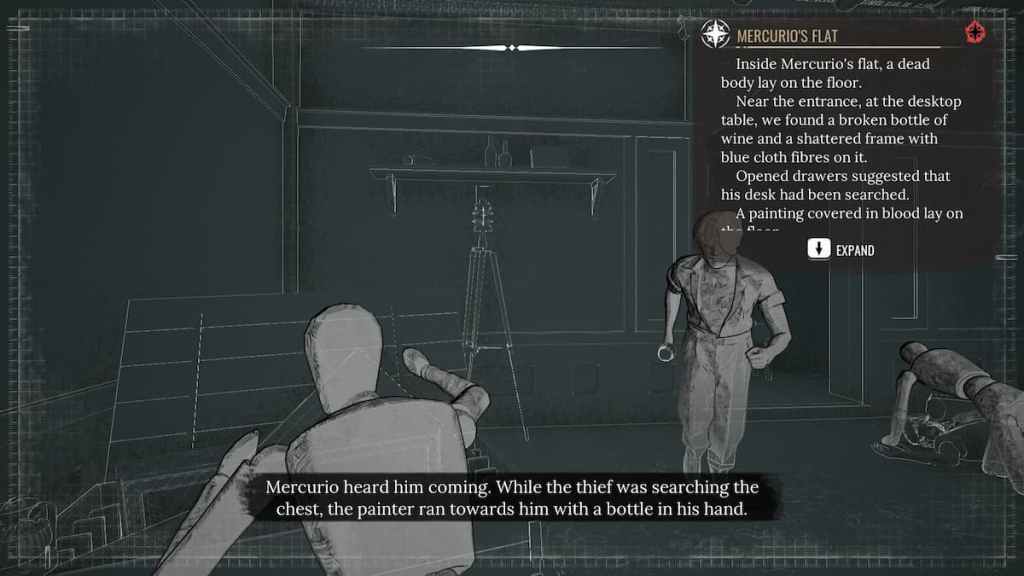
After you see them , anodeshould appear in the bedroom — interact with it toreconstruct the sceneof the crime as trace :

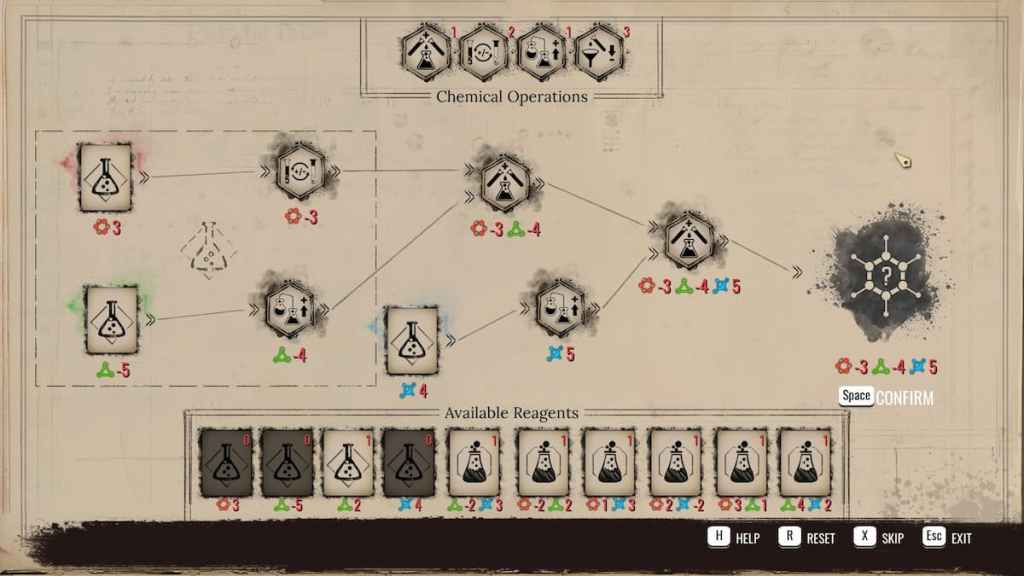
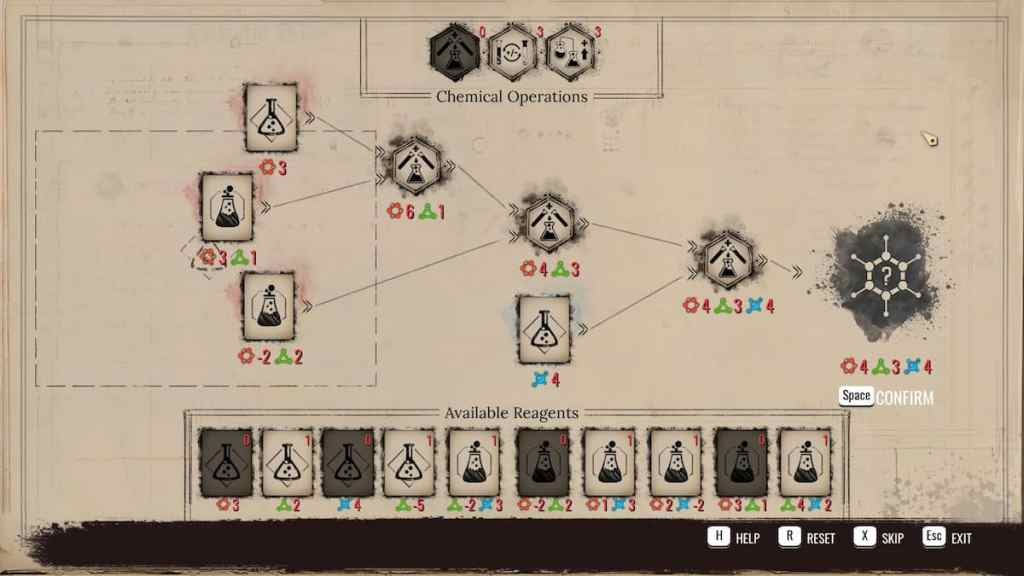
Now grab the blood line - stain house painting and choose to perform achemical analysison it from yourcasebook(see the screenshot below for the correct compounding ) .
rate the restored house painting on the easel and observe thetwo differencesin the room — a missing animal skull and a large login the nook . Interact with the log and empty space on the wall where theskull once hung .
Go back into Mercurio ’s darkroom and look on the floorto your odd — you’ll find the missing skull along witha agonizing photo , which is the net clue for the area . Jon will take it from you and only adumbrate the relevant pictures of aFemale Refugee and the Devil Suspect upon finding it .
Jon Challenge 1 : After learning the truth , Jon will implore you tostay in characterwhen speaking to the landlady and to sedately expect her to call the police force . For the respectable outcome , choose to stay calm and in theatrical role during your talks selection with her — you will win the Jon ChallengeDead Man Walkingand get better information about the murderer .
Speak with the landlady as you see fit and kick the bucket the flat . From here :
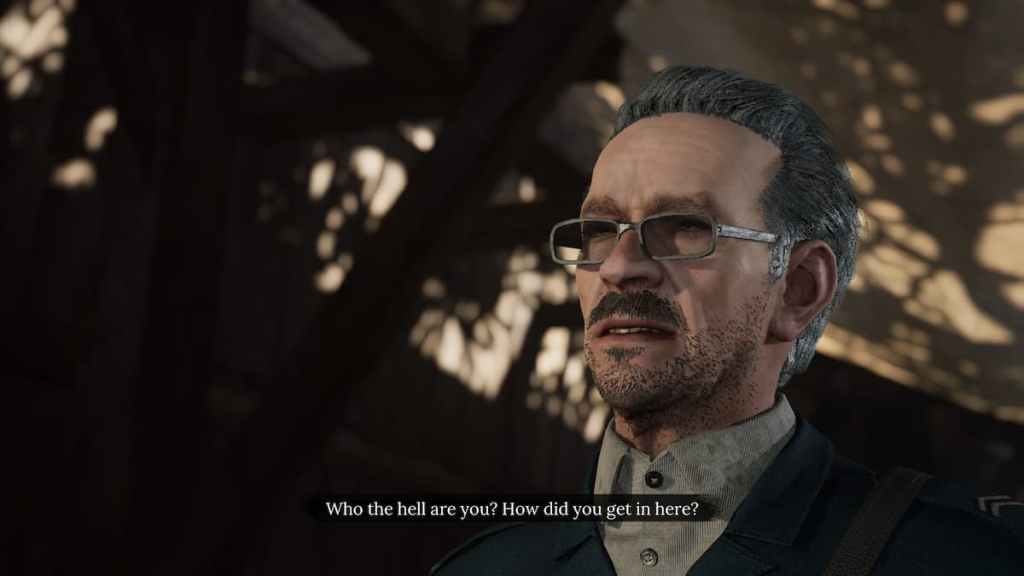
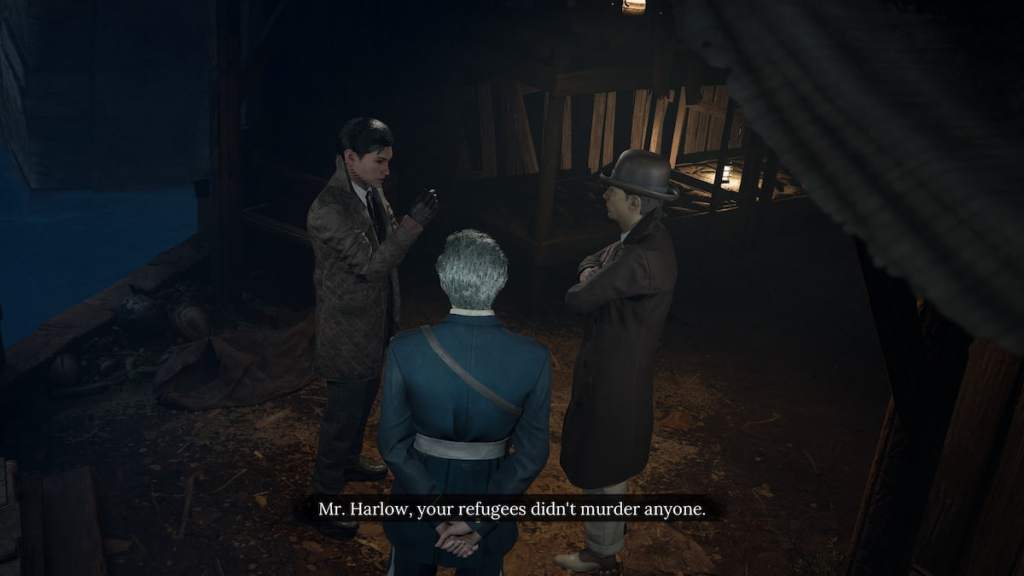
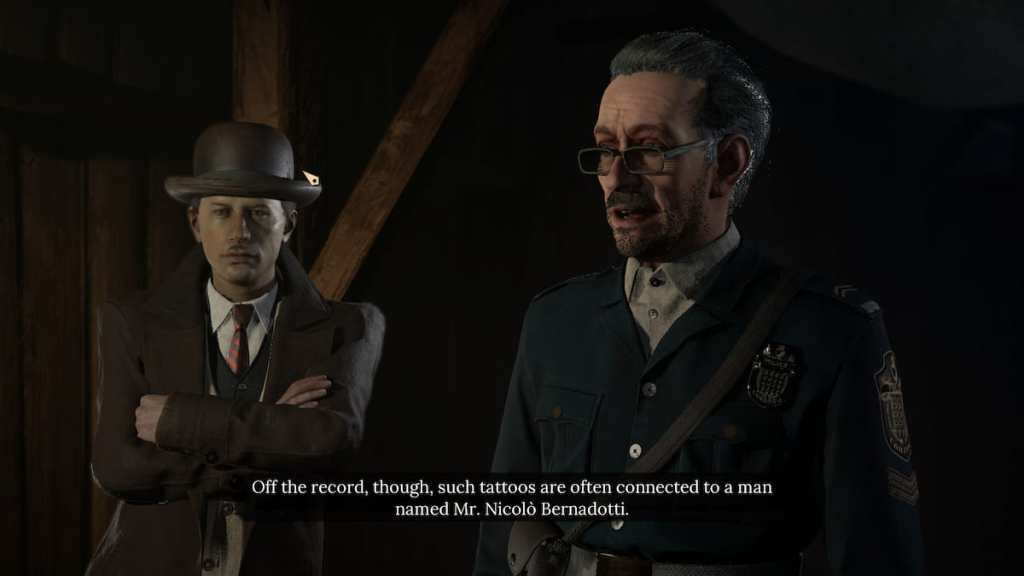
You ’ll be pointed to a Refugee Camp locatedbelow Victoria Bridge , which you ’ll observe between Silverton and Scaladio . When thwart the bridge deck , look for an opening night to the side which will precede you down a stairway and into ashouting moband the police . talk to Mr. Harlow ( the man in thebrown hatand coat ) to progress .
After youobserve and profilehim , run through his dialogue alternative as you see set and take the opportunity tooffer your assistancewhen prompt . Eventually , he ’ll relent and admit you entree to the Refugee Camp . Ask him about the situation and move into the coterie to speak to amiddle - aged officerjust inside .
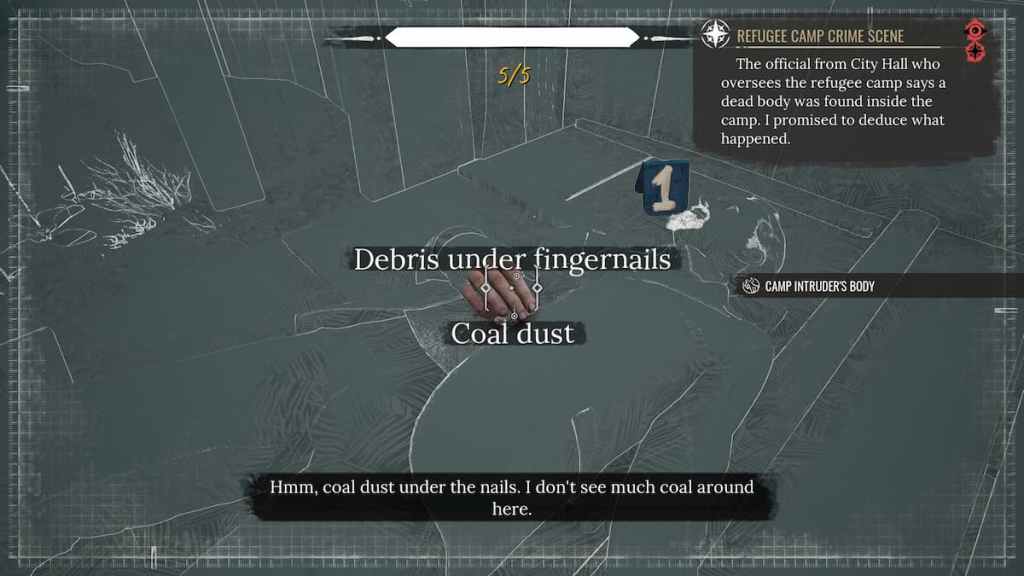
After you ’re up to speed on the office , push deeply into the camp to investigate thedead soundbox to your leftto examine a flaming dagger , a neck tattoo , and boots . recruit Concentration Mode to analyze the hand .
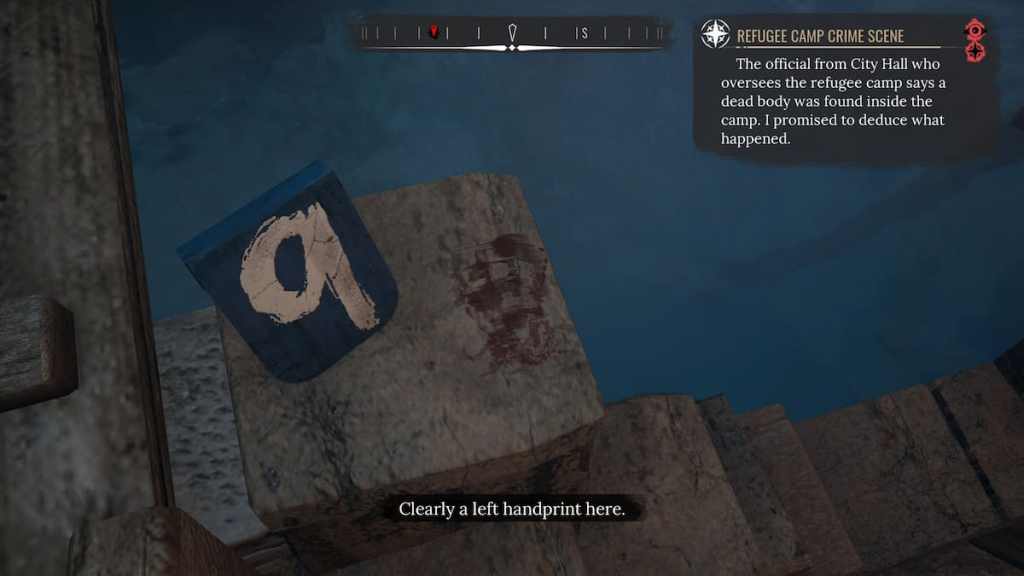
From here , follow thenumbered trailthat Cordona PD has conveniently left for you and you ’ll get one or two man of easily spotted grounds at each marker . The trail goes from 1 to 9 , and you could find number 8 - 9 near the summer camp entrance , nigher to where you happen the consistence .

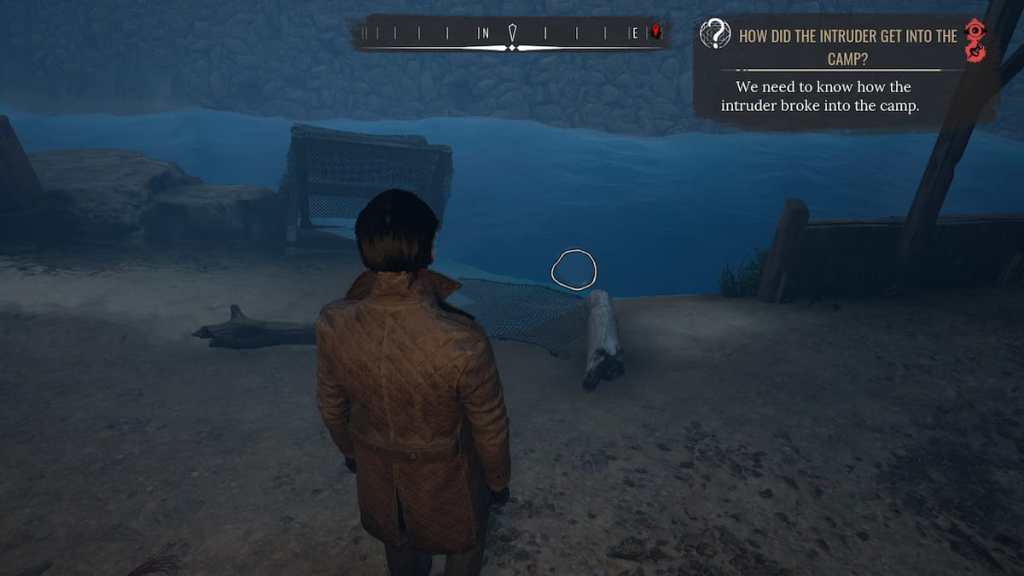
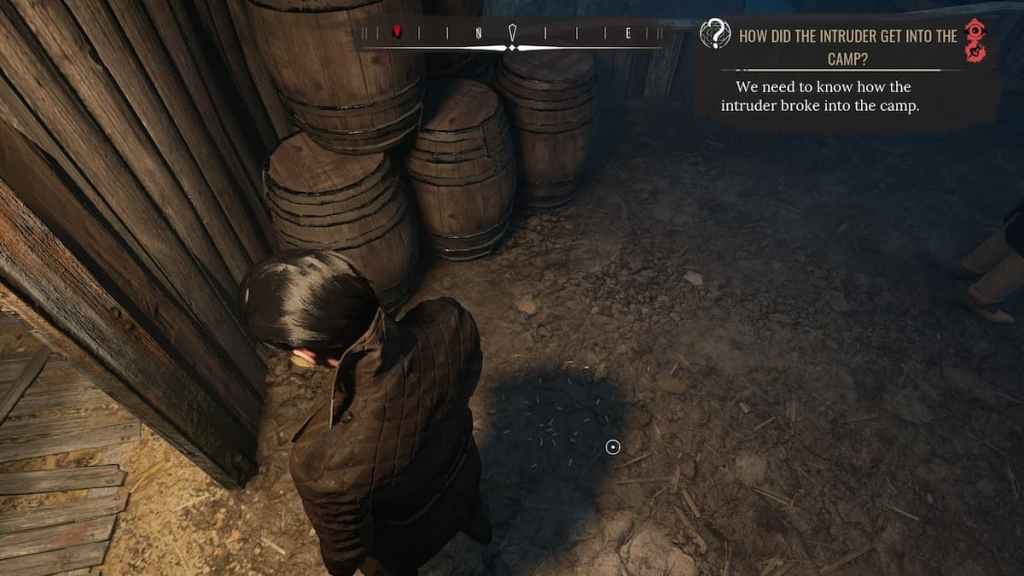
From here , pin the evidencehow did the intruder get into the camp — examinethe beachnear the back of the encampment and aladderbehind the middle - aged ship’s officer .
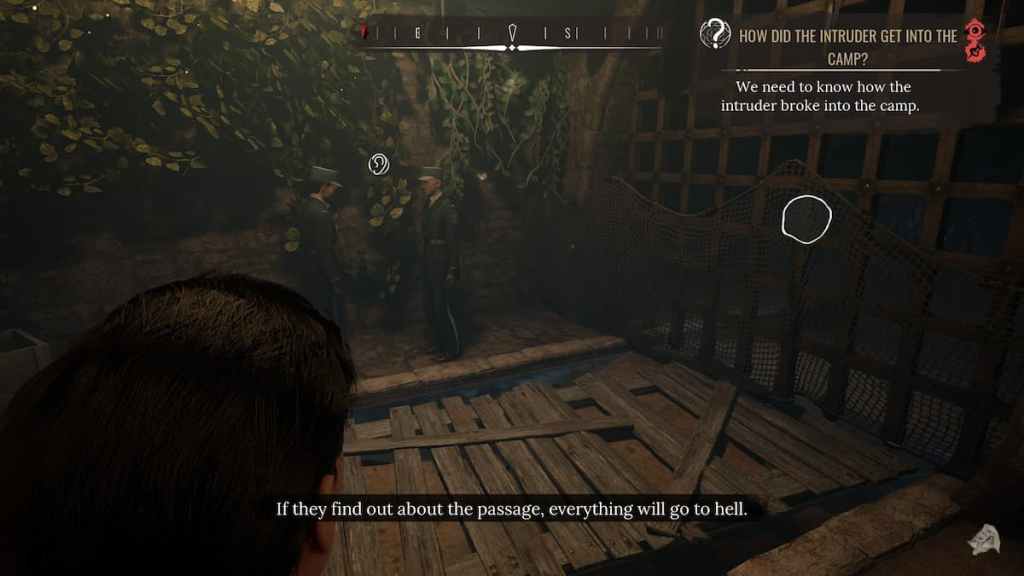
Now moveinto the tunnelclose to where you found the dead body , you ’ll find oneself a sewer entrance and two cops you caneavesdrop on .
To successfully listen in on the two cops , choose tokeepthe follow phrases :
Now head to themain entranceandlook downto find a mess of cigarette . inquire the galvanic pile — you’ll find aMalPal cigarettebutt which confirm that the police force just lease the killer in the front room access .
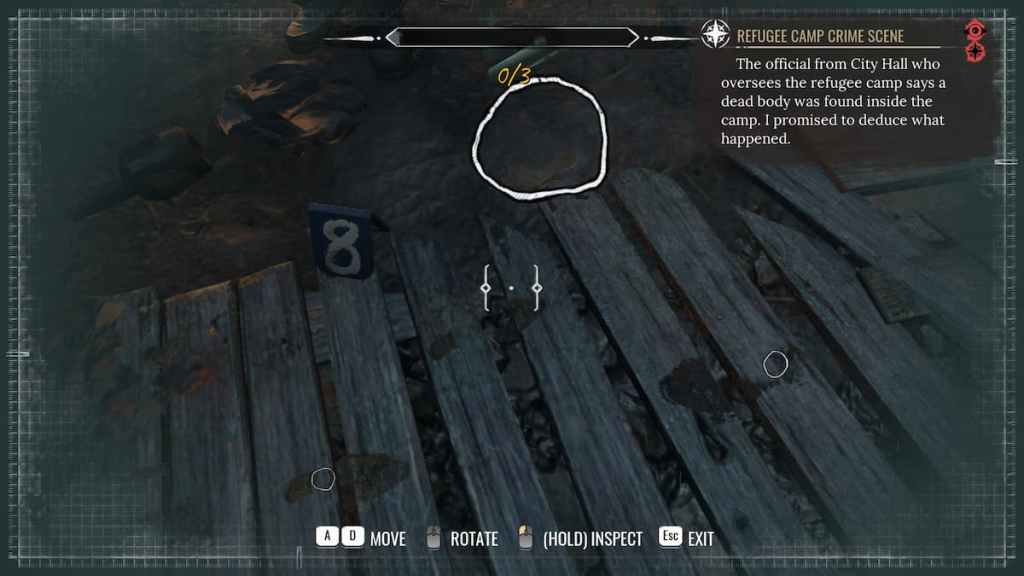
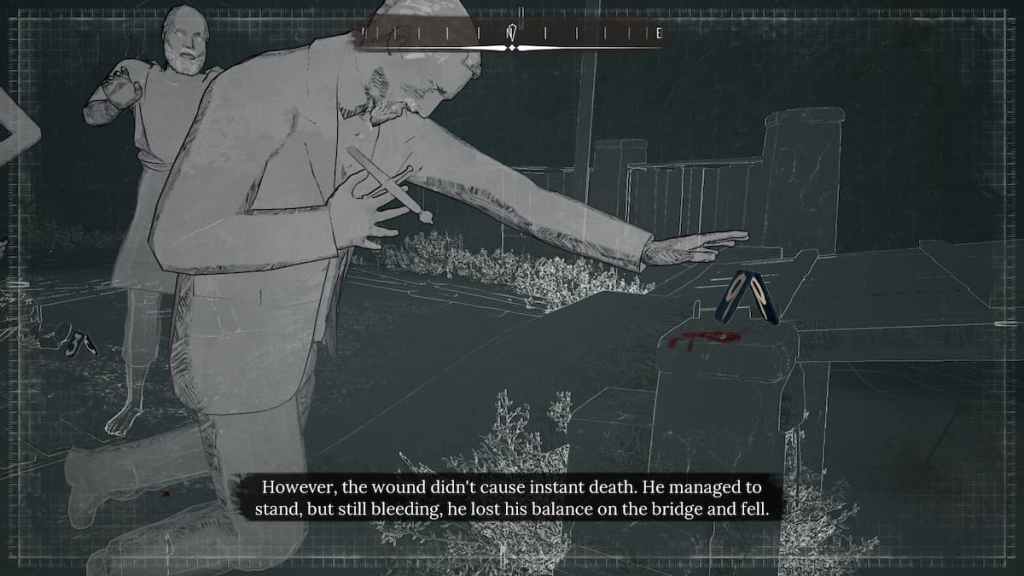
Head back into the cantonment to encounter a lymph gland , interact with it toreconstruct the eventsof the conniption . To successfully do so , start atevidence marker 7at the back of the camp and order the figures as follows :
Afterward , go back to speak with the mediate - aged policeman and Mr. Harlow to share your findings .

Jon Challenge2 : During your time in the refugee coterie , Jon will need you to go a step beyond and figure out what ’s going on behind the picture . To complete thewhat ’s go on at the refugee campchallenge , speak to one of the refugee with thechallenge pinnedafter you ’ve absolved them of blame in the case and you will complete the challenge .
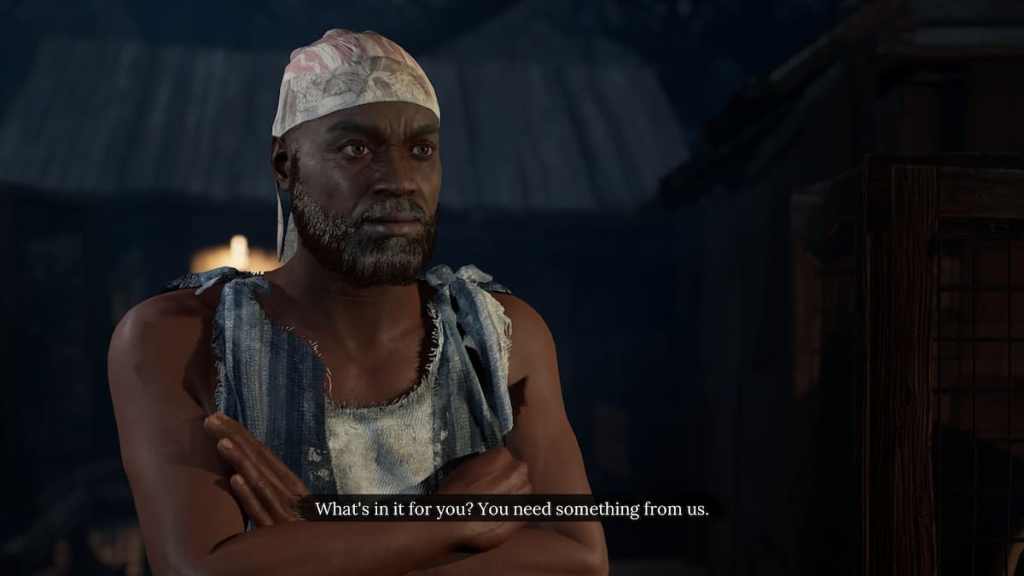
Nowpin the photograph ofNeila , the female refugee in your photo , and go to the back of the camp to talk with the refugee guarding the shack . Run through his dialogue options and eventually you ’ll get the chance to talk with Neila .
She ’s not exactly felicitous with your go of helper , but she providesan integral cluethat will lead you to the people responsible for her psychic trauma — a drawing ofa badgeon the photo of the Devil Suspect . Before you pass on the camp , speak with the middle - aged officerabout the tattoo you found on the beat body , and he ’ll point you in the proper counseling for the plate reach of this shell .

Jon Challenge 3 : Jon will suggest you help thedying refugeewho was wounded while helping Neila . Pin the challenge , snaffle somehanging clotheson the right side of camp , someAloe Verain the sewer burrow , and interact withthe culdronat the middle of camp .
In your casebook , go to the challenge and startchemical analysis(see screenshot below ) . After you win , interact with the wounded refugee to complete the challenge . If you leave summer camp after you ’ve lick this part of the case , you will fail the challenge .
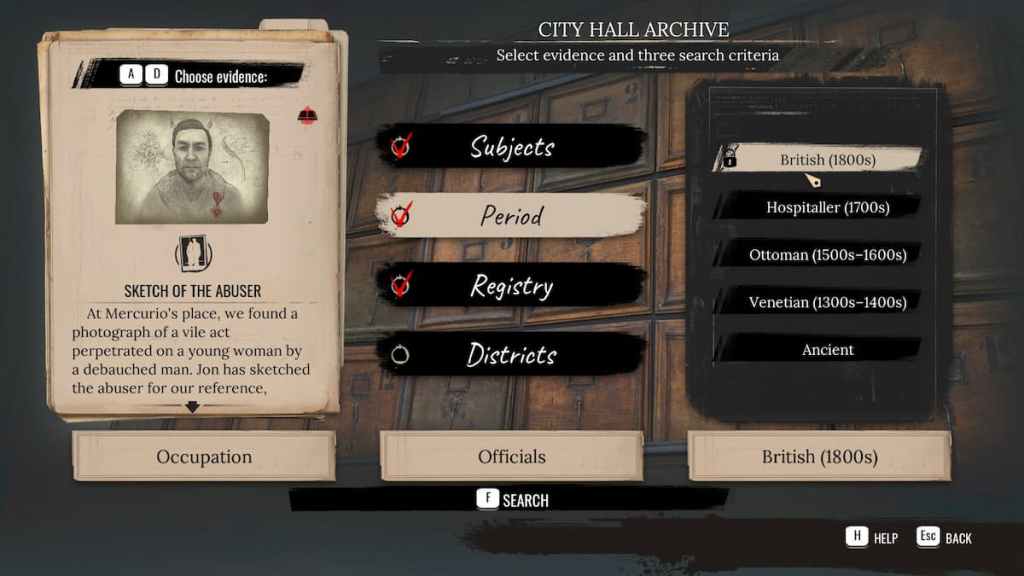
allow the refugee camp and travel to theCity Hall Archives . Pin the evidencesketch of the abuserand search the following criteria :
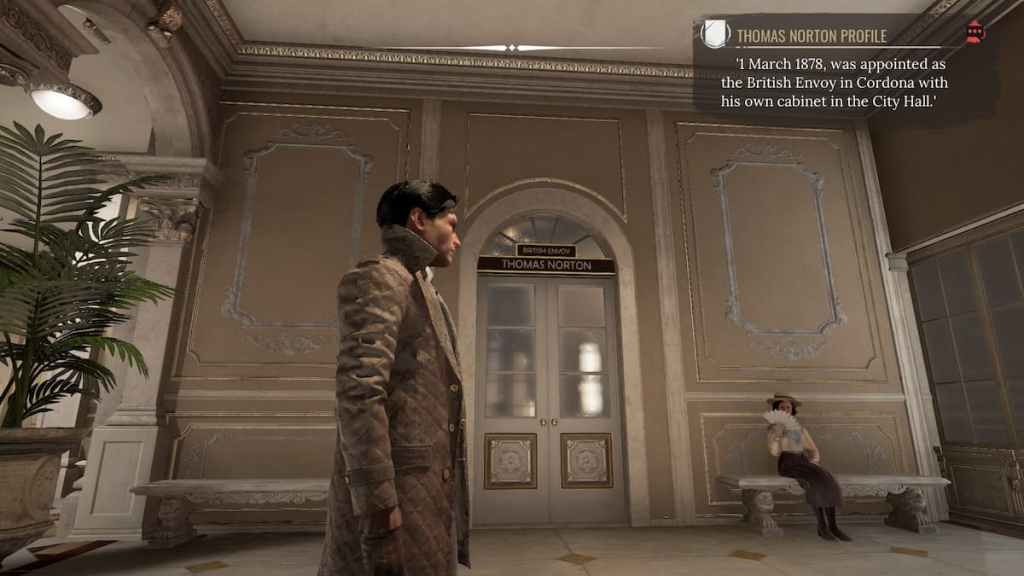
Doing so will point to a man namedThomas Norton , who you could findright down the hallthrough a boastful door with his name on it .
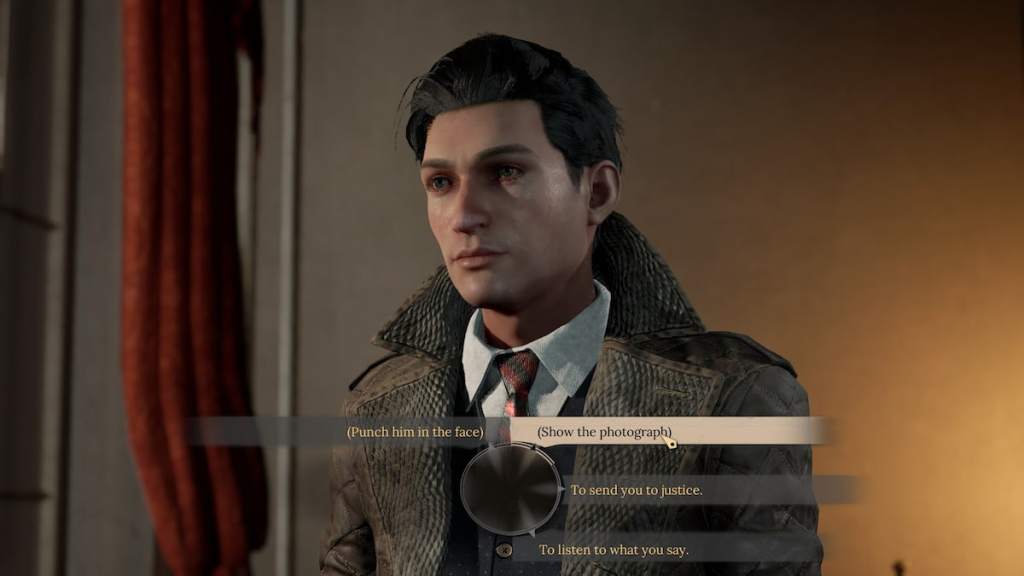
Enter the room and you ’ll see Norton . Speak to him and you ’ll be able-bodied toobserve and profile him — your pick of the profile does n’t change much , only how irritated he will be with you . Although it may be tempting to perforate him in the face , when you ’re prompt , choose toshow him the incriminating exposure .
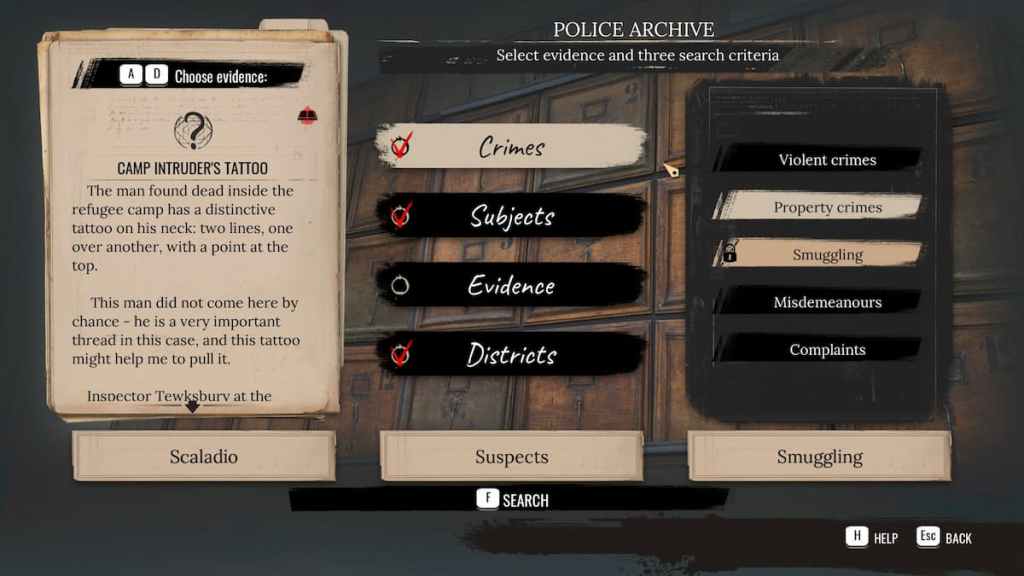
When you do this , he ’ll soften and attempt to rationalise his part as the abuser in these events . He ’ll also ask you for thephotograph — keep it in your back pocket a niggling minute longer . To marry up all loose threads , lead to the Police Archives , pin the camp intruder ’s tattoo , and participate the next criterion :
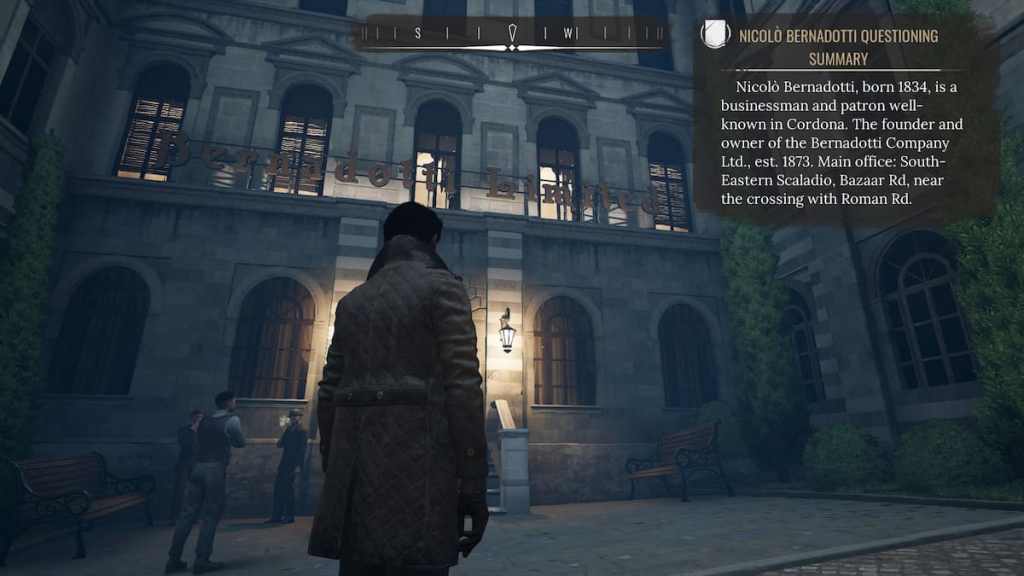
A successful search will point you toBernadotti Limitedwhich you could find near the convergence ofBazaar Rd and Roman Rd . Head there and get ready for a fight .
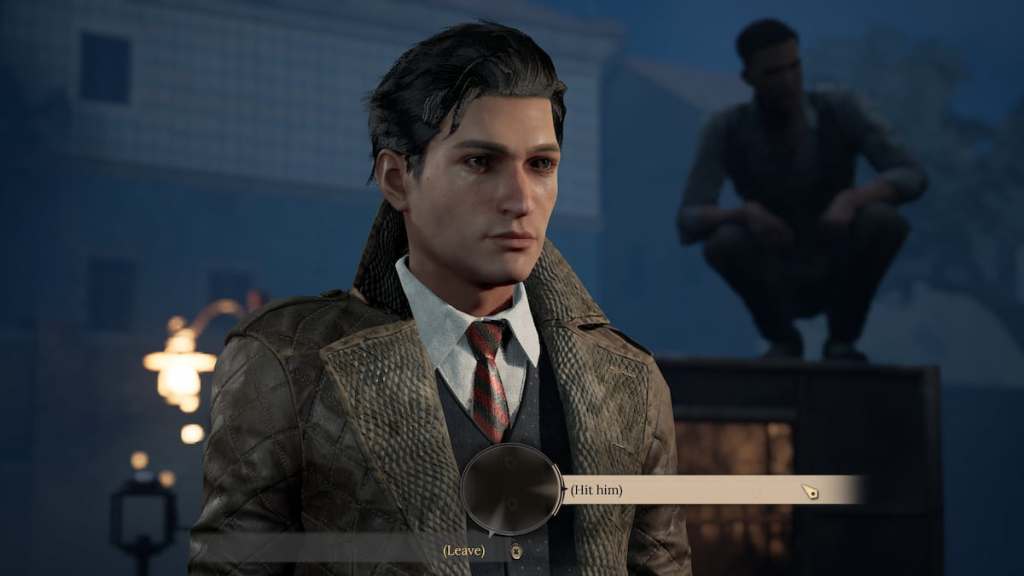
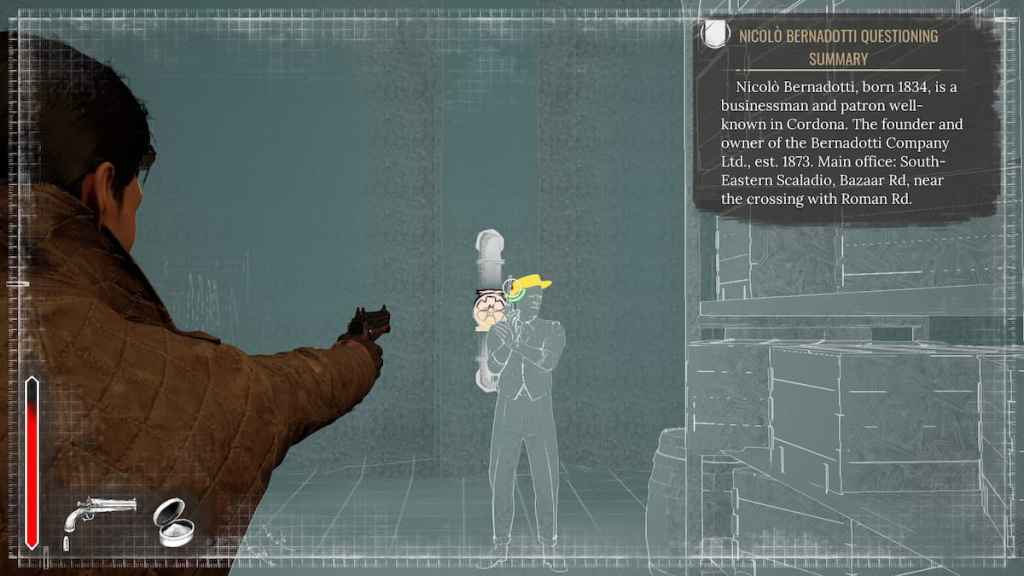
Do n’t vex with thelocked front door . or else , head around the right side of the edifice and to the back . Examine somecrateson the right side and somedollsalong the means and eventually , your progress will be blocked by a guard at the back entrance . you may choose other dialogue options , but you will have tohit himto progress .
Once inside , you will be thrust into a conflict that sendsthree waves of enemiesat you . continue on the move and deal with them accordingly — there are scores ofenvironmental aidsto help you in the elbow room .
Once they are grapple with , place the doorto the leftof where you originally embark ( seen below ) .
Now head through the door behind the receipt desk to have a face - to - expression with Bernadotti himself . There are a few items to investigate in his way , but they do n’t shift the effect at all . Speak with Bernadotti toobserve and profilehim — prefer to describe him as acriminal mastermindwill result in a smoother conversation .
relate : How the Mind Palace works in Sherlock Holmes Chapter One
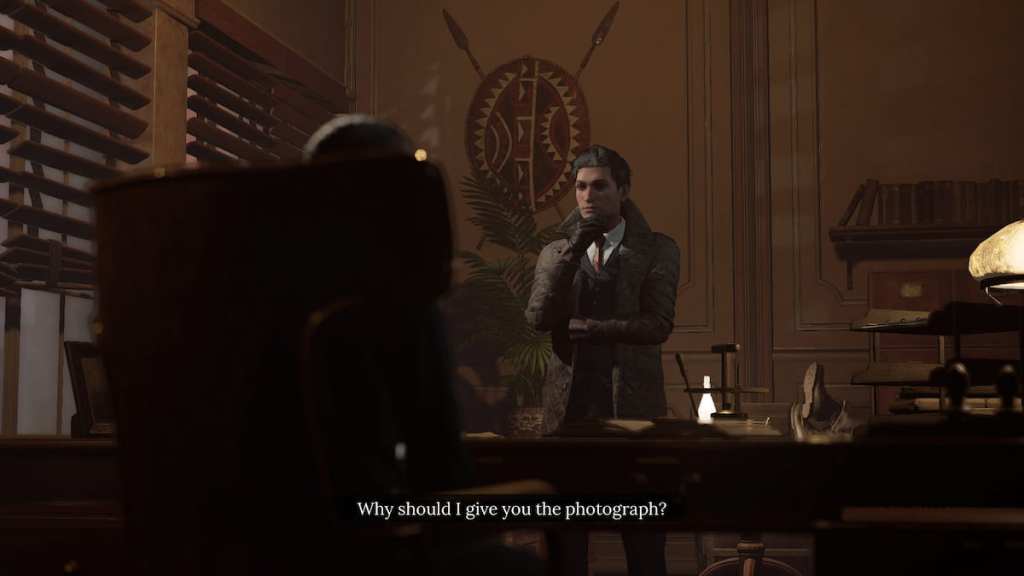
Exhaust his talks options and , like Thomas Norton before him , he will ask for the photograph .
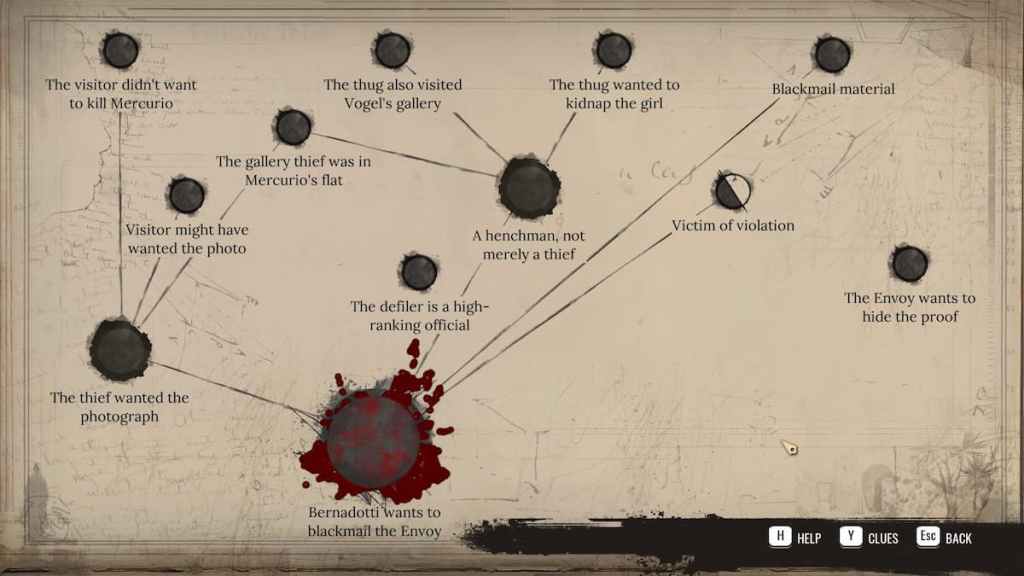
Now enter yourMind Palaceto connect all of the hint as play along and let ’s finish this case :
This will lead you to a add-in with onlyone split price reduction , which changes the determination entirely depending on how you choose to see it . Both party are guiltyto some degree and it is left to your free will whether to give the picture to Bernadotti , Norton , or Vogel .
There isno proper or wrong solution in this cause . Each choice number with its pros and cons , but the choice is exclusively up to you . Give the photo to the person of your choosing and thenreturn to Vogel . Speaking to him will finish this dark mystery for now .
For more guides and secrets in Sherlock Holmes Chapter One , mark off outAll Bandit Lair Locations in Sherlock Holmes Chapter One , orWho is Jon in Sherlock Holmes Chapter One?and stay tuned to Pro Game Guides for continued coverage on all of your favorite games !