Unleash the Pseudogiant and let it do your bidding in Just Business side pursuance .
Stalker 2features numerous side seeking , many of which include optional objectives . fill out these optional tasks often makes the primary aim easier to action , and the Just Business side pursuance is a large example of this . aid NPCs in Stalker 2 is almost always rewarding , and this pursuit is no elision . In this guide , we will explain how to start the Just Business side quest and provide step - by - step instructions to help you dispatch it .
How to Get the Just Business Quest in Stalker 2
To start the Just Business side quest in Stalker 2 , you will require to speak with the underground barman . To see this location , head in the south from the Toad vendor . This vender not only sells items but alsobuys busted weapons , make him a utile stop along the elbow room . Keep an eye out for walls marked with “ 6ap 100 ” sign — they will guide you to the right spot .
Inside the hugger-mugger measure , you will find a twain of Freedom faction phallus hanging around , along with the barman himself .
How to Complete the Just Business Side Quest in Stalker 2
The Just Business side pursuance give you two objective : pass through the brigand groundwork , and locate the wanting Freedom member . While you may head straight to the bandit base and omission dealing with the Freedom group , taking the sentence to complete this optional task can make your journeying far smoother .
Doing so grants admission to a secret tunnel and a rare artifact — an point that is otherwise challenging to obtain in Stalker 2 .
Related : Stalker 2 : The Forge of Progress Walkthrough Guide
Finding the Missing Freedom Members
To reach the Freedom group members in Stalker 2 , you will need to direct northwest from Rostok . It is a long trek to the Red Forest , which you’re able to only access after crossing the Yaniv realm .
To make the journey manageable , ensure you are never cumber — or else it will take much longer to get there . Along the agency , you might encounter Bloodsuckers or , worse , get caught in an Emission storm with no shelter nearby .
Once you arrive at the parking region , your object is to ascertain Carl , who is located inside the footlocker elbow room .

Screenshot by Prima Games
NOTE : Be aware of a potential bug that might prevent Carl from being immediately seeable . As you come on the lockers , you should see a Heal Carl Clinch interaction prompt on the ground .
Healing Carl will eat one Medkit from your stocktaking , so make certain you have at least one before set off the optional object glass to find the missing Freedom phallus as part of the Just Business side pursuance .
After you mend him , Carl will give you a headstone to access a burrow that supply a lineal , circumspect route to the Warehouse , where the bandit are hiding .

Screenshot by Prima Games
The tunnel entrance is located on the second floor , mark by a white door with a white light at the end of the hallway . While this crosscut lets you avoid detection on your way to the Warehouse , the tunnels are diffuse with acid anomalies .
If you have a good detector , like the HILKA sensing element , verify to equip it as you navigate the tunnels . There is a worthful Ciliate Artifact hidden here , which is a great discovery during this side quest .
Get Inside the Bandit Base
As you move on through the tunnels , you will eventually reach a ladder at the end . Climbing this run will bring you to the Warehouse , where the next phase angle of the Just Business side quest begins .
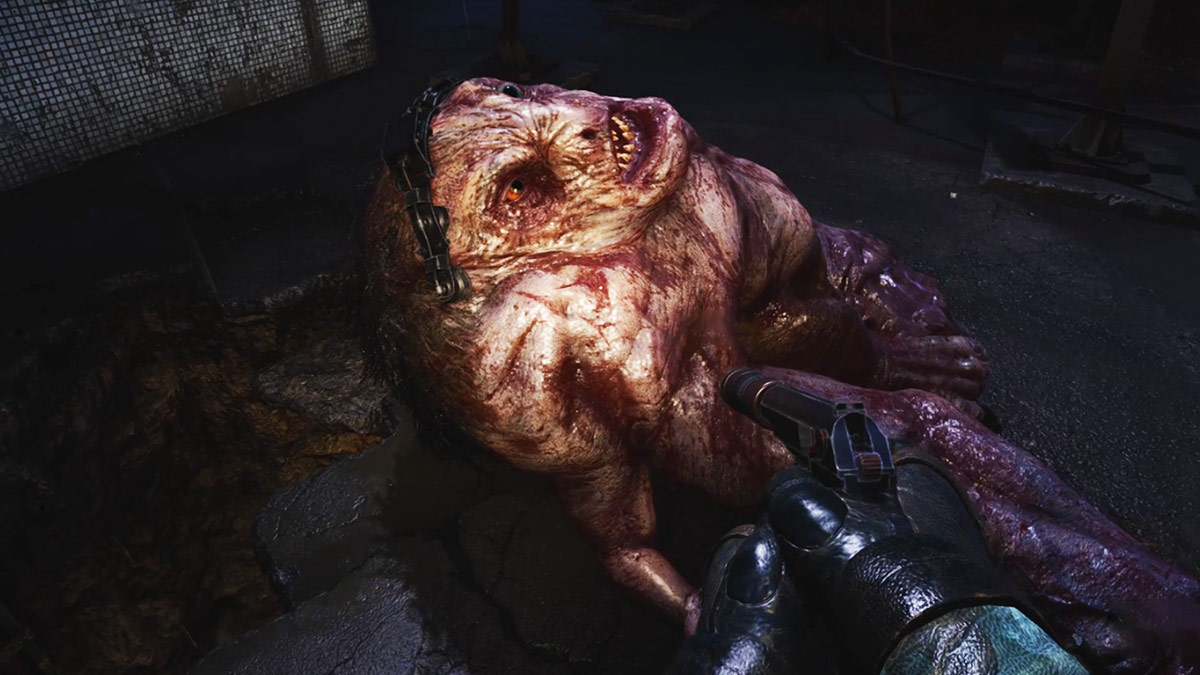
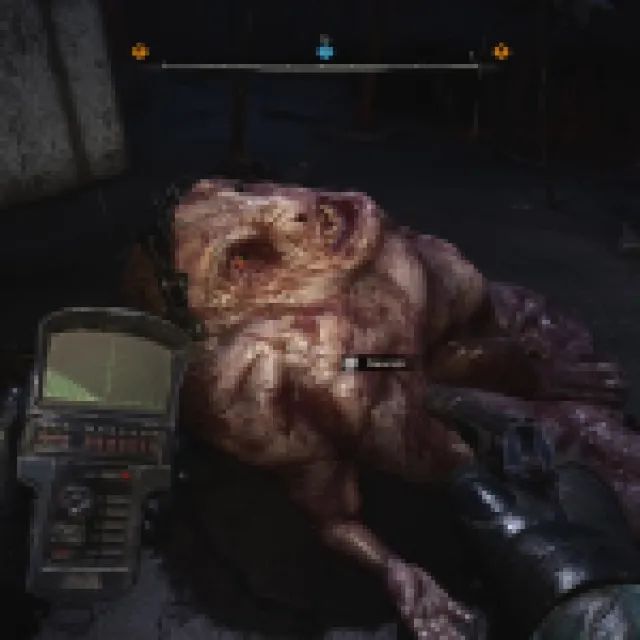
Your primary objective here is to rid of all the bandits and then take down a variation known as the Pseudogiant . You will discover the Pseudogiant inside a container within the Warehouse .
To locate it easily , look for a container marked with scandalmongering pigment and a wooden box near it , which also has a few yellow pigment markers .

Screenshot by Prima Games
mount the container and you will reach a container with a lot of wooden boxes . Use your knife and separate all the box , then pass over further down . Doing so will trigger the Pseudogiant ’s escape from the container and it will rush towards nearby enemy .
Once the Pseudogiant emerges from the container , you may use it strategically by luring it toward the brigand and letting it attack them . To do this effectively , keep energy drinks in your warm - access slot to preserve your stamina as you conduct the variation . This tactics can make clear out the bandits faster since the Pseudogiant does most of the work for you .
However , be cautious — if you get too close to the bandit , the Pseudogiant will target you as well . While this method acting weakens the mutant as it take away harm from the bandits , it also poses a risk if you are not careful .

Screenshot by Prima Games
After the bandits are dealt with , you will need to kill the Pseudogiant yourself .
Once it is defeated , loot its corpse to collect the Electronic Collar . While the collar is not take to fill in the Just Business side quest in Stalker 2 , it play a role in another quest called In the Name of Science .
Just Business Side Quest Reward
Once you are done eliminating the bandits and the Pseudogiant mutant , head back to Rostok and interact with the Barkeep . He will give you the Sphere M20 Helmet as a payoff for completing the quest .
That is everything you take to know about how to get and complete the Just Business side quest in Stalker 2 . For more tips about the biz , we commend you check outHow to Fix Hot on the Trail Bug , How To apply Console Commands , andHow To Fix Bunker Not Opening Bug in Just Like the Good Old Days Mission in Stalker 2guides .

Screenshot by Prima Games

Screenshot by Prima Games

Screenshot by Prima Games

Screenshot by Prima Games

Screenshot by Prima Games
Screenshot by Prima Games

Screenshot by Prima Games
Screenshot by Prima Games
